The House on the Hill

Renovating a house from the 70s in the South.

  • Home
  • About
  • Get In Touch
  • House Tour

making things right

July 3, 2014

This is a very wordy post but I think it’s necessary. You’ve been warned.

Kyle and I are amateurs on the home renovation front – not a shocking revelation, I know. We’re learning a lot as we go but sometimes (often?) our first attempts don’t turn out the way we’d really like them to. Nobody likes to admit when they’re wrong and nobody likes going back and having to do something a second time because they screwed up the first. I think it’s really important to share all of our mess ups along with the projects that turn out well. I’m pretty sure I’ve said that before but it’s something I feel strongly about. I read DIY and home improvement blogs because I can relate to them but being perfect all of the time and having every project turn out flawlessly is not relatable.

I say all of this to say that we’re redoing our powder room. Yes, the same room we tackled last summer.

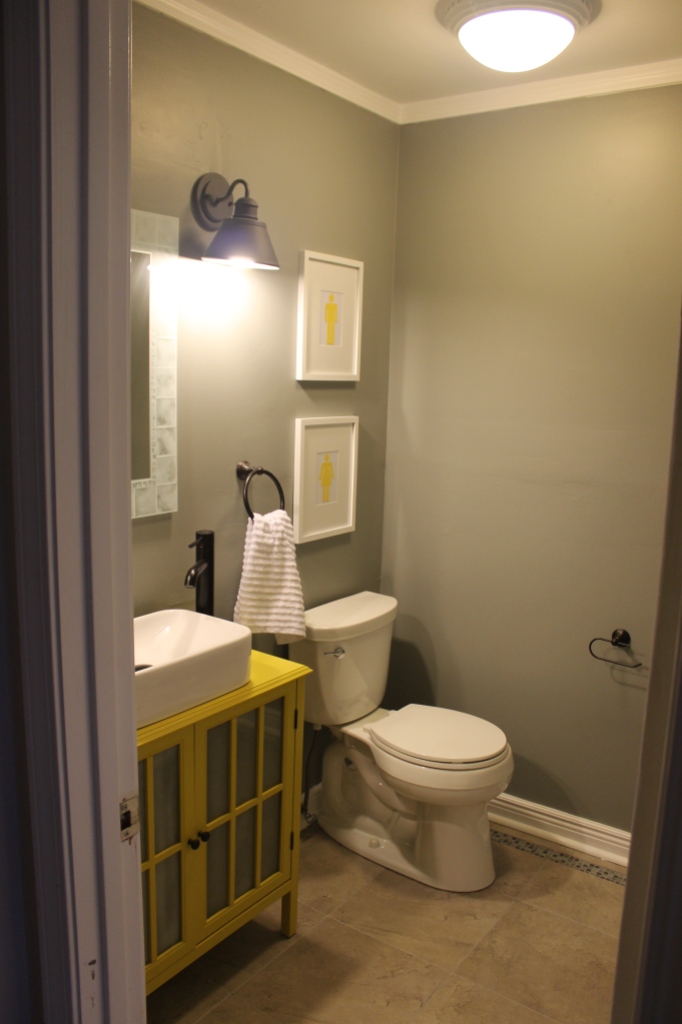
IMG_1417

It’s insanely frustrating and I hate being wasteful but it’s something we think we need to make right. We want to do these projects ourselves, but we don’t want them to look like bad DIY. We’ve been putting this off because leaving it as is feels less like we wasted money and hours, weeks really, of our lives. This bathroom looks fine in that photo but in real life, there are so many things that didn’t turn out well. Minor mistakes and imperfections are fine with us – we’re not perfect and we don’t try to pretend that we are. The mistakes in this bathroom are bad enough to make us break down and start over.

We probably spent around $700 – $750 on our first attempt which got us some new drywall, all of our flooring  materials (new subfloor, cement board, thin set, tile, grout), new fixtures, lighting, mirror, paint, trim – everything. We probably could have spent much more but even so $750 is not a small amount of money – not to us, anyway. We aren’t planning on spending anywhere near that much this time (I’m pushing for $200 or less) but it’s still going to take a lot of effort. The only thing that makes me feel better is that we originally wanted to stay under $1k and I think we can still do that.

So what exactly is so terrible?

1 – Floor: This was our very first (and so far only) tile job. It’s actually not awful, but there are some issues. First of all, we didn’t think about the fact that the glass tile was a different thickness than our large gray tiles and we didn’t account for that. You don’t really notice unless you walk on it or look really closely. Some of the gray tile got a little chippy when we cut it and we also didn’t make sure to clean out the thin set that squished up between the tiles so there are a lot of dark gray areas that show through the grout. Speaking of the grout, the color is not really what we were picturing. The corner where the glass tiles meet also looks awful.

We aren’t planning on touching the floor any time soon. There are things that bother me about the floor but it doesn’t make any sense to rip it out right now. Eventually, we’ll be putting hardwood throughout the whole downstairs and we’ll most likely choose to put it in here, too. That’ll probably be a few years down the road so for now the tile stays.

You can see the chipped and uneven tile plus some of the thinset in this photo:

IMG_1437

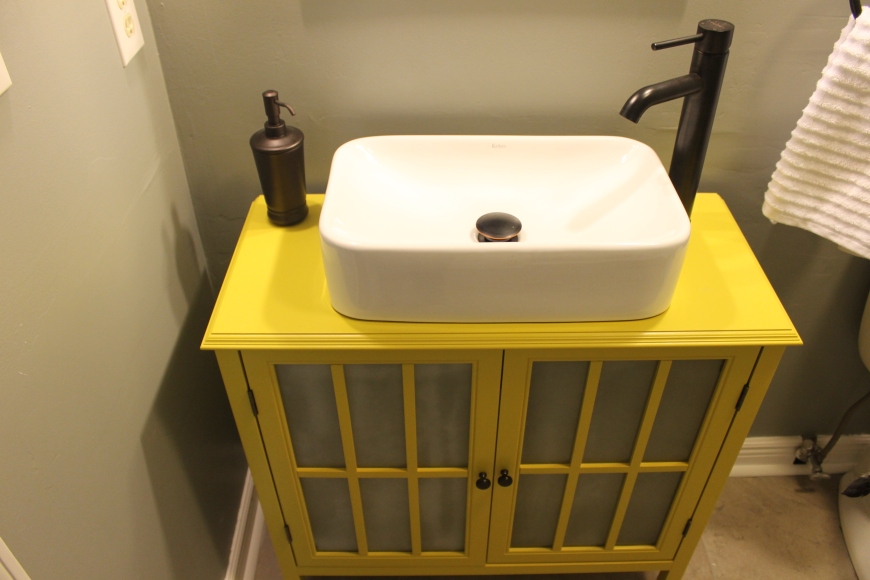
2 – Sink choice: I love vessel sinks. I still love our vessel sink. I think they look really cool and we’re keeping ours, just not in this bathroom. The issue with vessel sinks is that they splash – a lot. When we have people over, this is the main bathroom that they use and we always end up with water all over the wall, cabinet, and floor. We’ve played with the idea of turning the water pressure down but we still think it’ll be too splashy. Our plan is to move this sink to the hall bath upstairs which is rarely used and the cabinet will be used for storage in my craft room (notice how we never finished frosting the glass). We haven’t found a vanity that we like so we’re hoping to build one. We’re going to reuse the original sink and faucet that we pulled out of this bathroom that’s been sitting in our garage for a year which will save us a little money.

IMG_1420

3 – Lighting: I still love our lighting but we just don’t have enough light in this little bathroom. The lack of light coupled with the dark walls makes it feel like a cave. The placement of the lights casts a shadow around the top of the room which doesn’t help the feeling. We replaced the old fan with a light/fan combo to add more light but the fan is so loud we usually keep it off and it takes a while for the light to brighten up anway. We’re thinking about just taking that piece out completely but we’ll see. The lighting isn’t a major issue but it’s an easy fix. We have places we can use the two sconces we have in there now and we already have a light fixture to replace them – we picked it up for $10 at Lowe’s on clearance last spring/summer. We still need to get shades for it but other than that, it’s ready to go. If we take the fan out, we can use it in our master bathroom which needs a new fan anyway.

 Fan/Light On:

IMG_1429


Fan/Light Off:IMG_1428

4 – Drywall: We installed some new drywall in this room due to a small mold issue from an old leaky toilet that was never addressed. On top of a really bad mudding/sanding job, we didn’t use the right thickness for the new drywall so some of our walls have two different thicknesses. We made the decision last night that we’re just going to hang new drywall in most of the room. Luckily, drywall isn’t insanely expensive but again, we could have avoided the extra cost and all of the extra sanding we’ll have to do. Lesson learned. Here are a couple of shots but these aren’t the worst areas and don’t show the places where the drywall thicknesses were different.

drywallbylight

Drywallbyvanity

So in short – we’re keeping the floor (for now), toilet, and mirror. We’re bringing in new lighting and a different sink (both of which we already own), building a new vanity, and hanging new drywall (which means new paint). We probably won’t start on this project for a couple of weeks but I think we’ve almost got our final plan and we’re going to be much more careful this time around. Fingers crossed we can make it look as good in real life as it does in my head.
Fixing our front porch

June 30, 2014

Way back in 2013 (so pretty much forever ago), we decided to try stripping the paint off of our front porch. Young House Love had done a post on stripping their deck with Behr Wood Stain and Finish Stripper and it seemed to work really well for them so I thought we should give it a try.

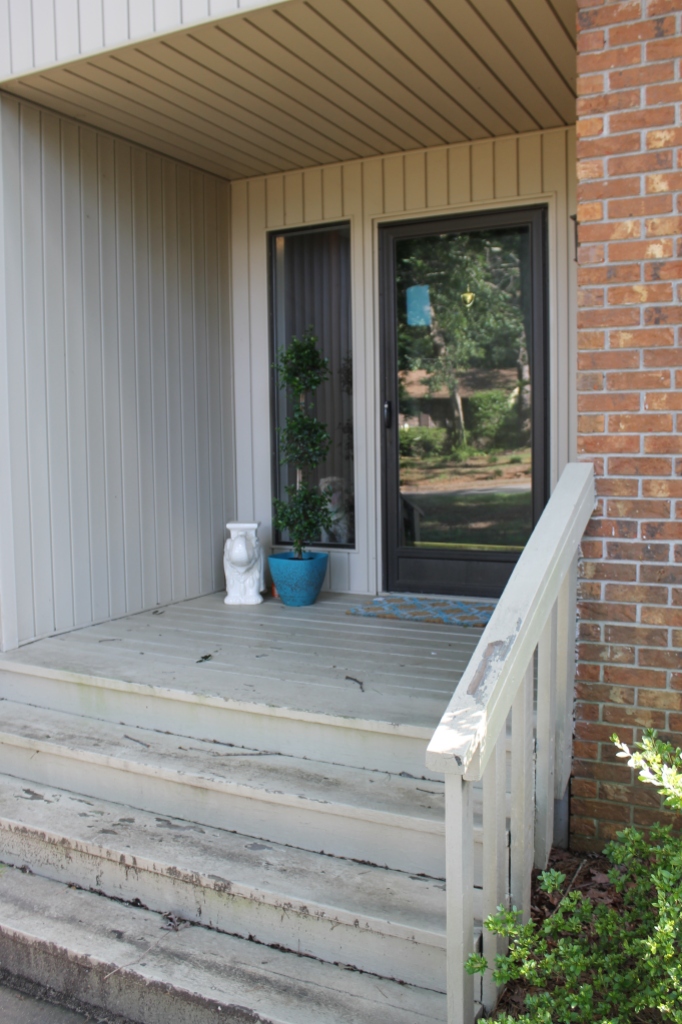
Here’s our very attractive porch before:

IMG_0415

Here’s our porch part way through the process (look, it’s working! Kind of…):

PorchDuringStripper

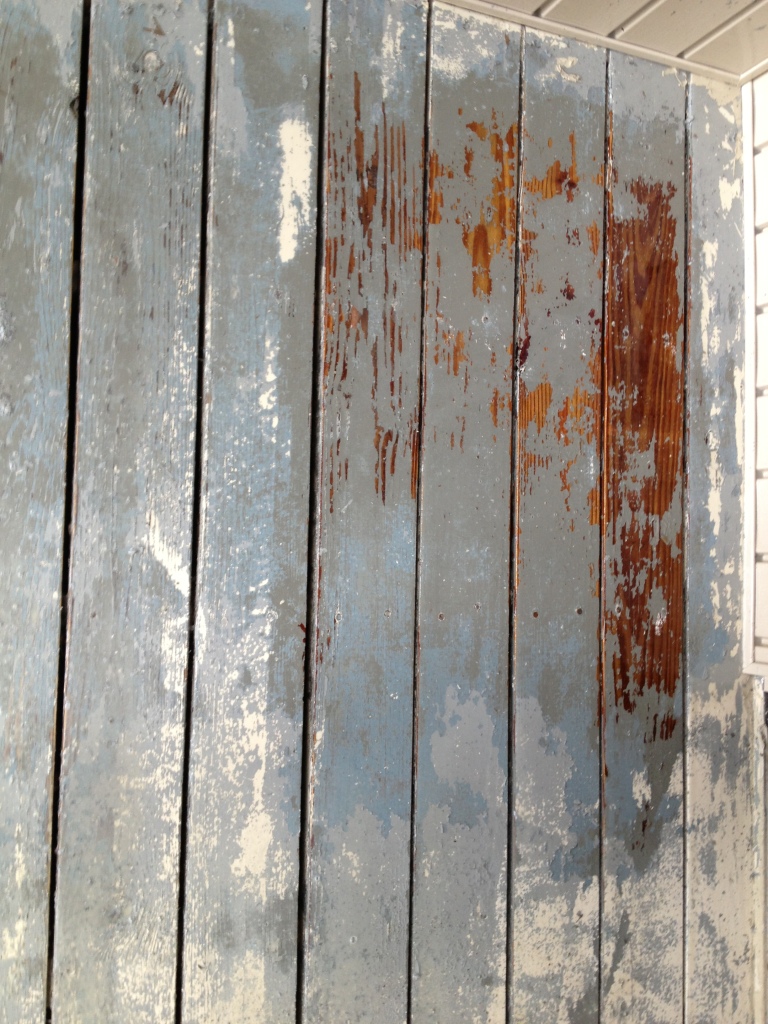
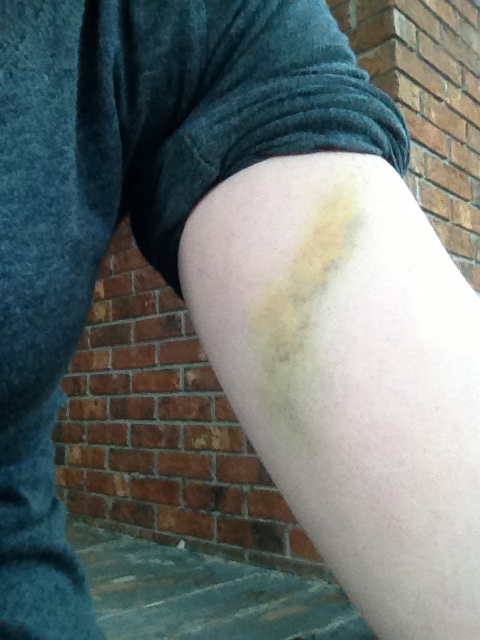
Now, before I show you the after I just want to say that I’m sure if our porch had only one or two layers of paint on it, we could have knocked this out in a weekend. Unfortunately that was not even close to a reality for us, so 6 layers of paint and primer, one gnarly bruise from falling down the steps and landing my arm in the bucket of stripper (at least it wasn’t a bucket of strippers, amiright?), and 3 weekends later, we were left with this:

PorchAfterStripper

OH, and this:

Bruise

Womp, womp. We had finally gotten down to raw wood in some areas but we weren’t even close to being finished.

Here’s what stress relief looks like:

Handrail

Of course it was at this point that Kyle’s dad suggested just flipping the boards over and using the other sides. Brilliant. So that’s exactly what we did…a solid six months later.

Lucky for us, Kyle’s parents came over to help while they were in town (Thanks again for all of the help! We would probably still have a horror movie porch if it wasn’t for you guys).

First, Kyle pried off all of the boards and I helped his dad pop out all of the old nails so that we could reuse the boards. Our porch looked like this:

NoDeckBoards

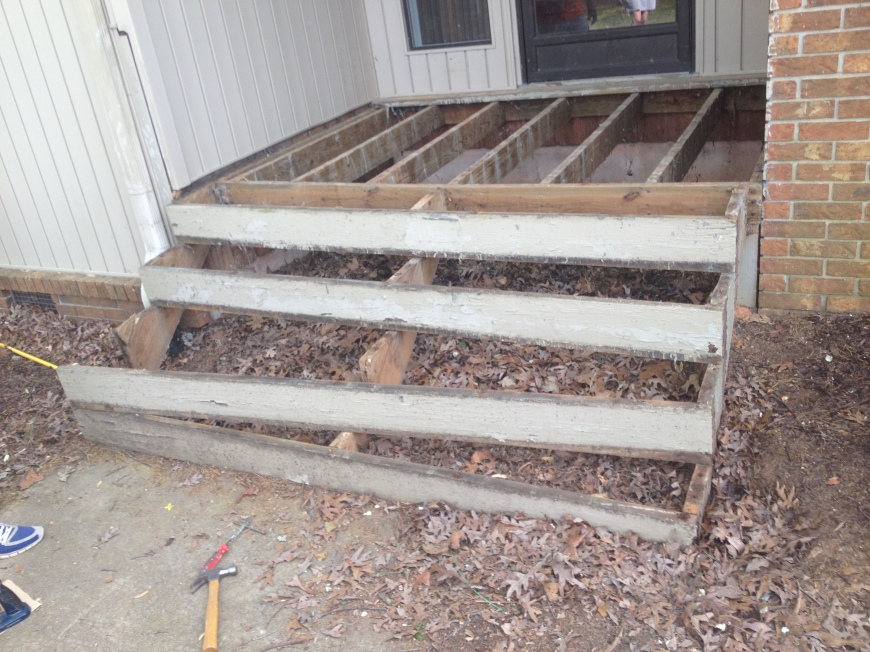
Kyle’s mom was on sanding duty – she used a belt sander to get off any paint and crud that had dripped down onto the side we wanted to use. In the meantime, stair treads were removed:

NoStairTreads

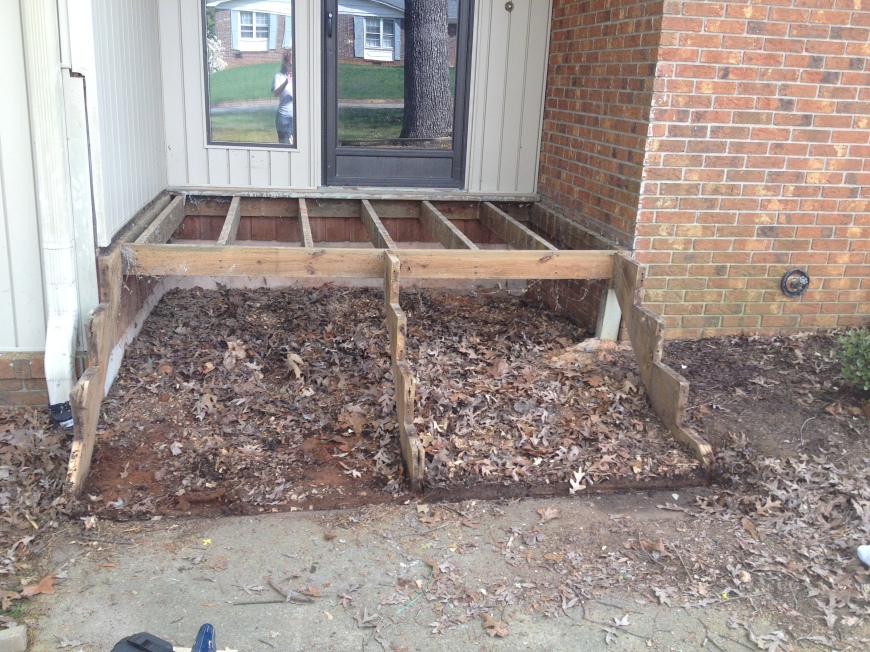
And the risers soon followed:

NoStairs

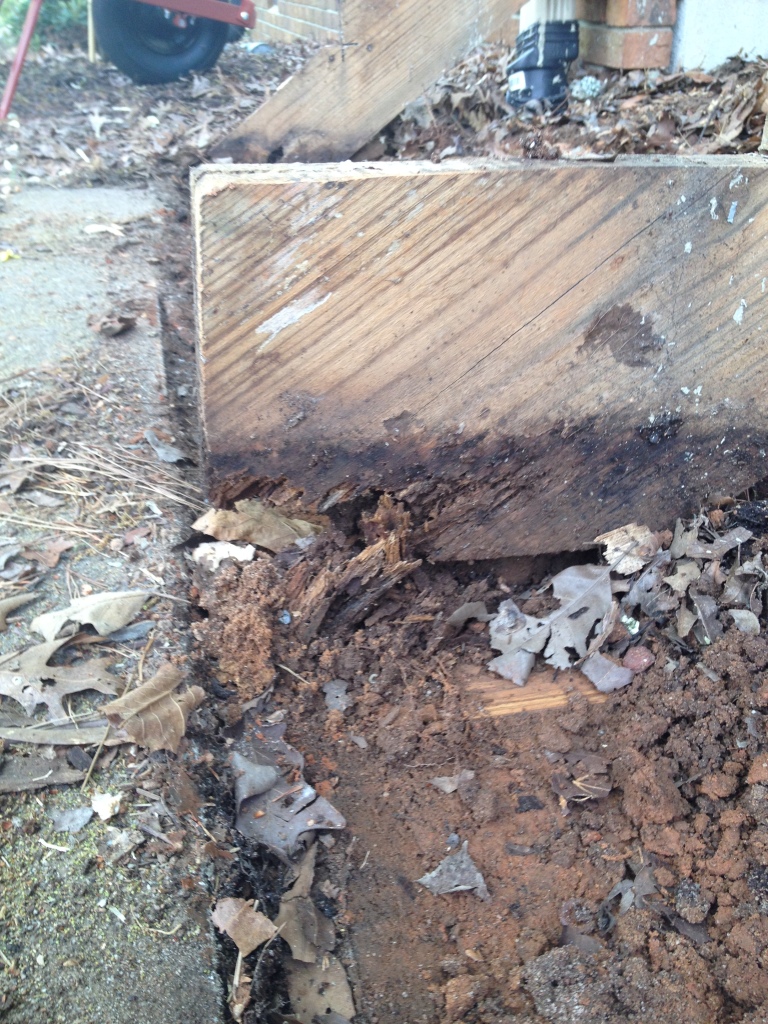
And then we discovered that our stringers were rotted out because they were sitting directly on the ground or directly onto other pieces of wood which were sitting in the ground.

rottenstringer

We also discovered that whoever built the porch had a thing for Cheetos.

Cheetos

Barley and Otter supervised.

Supervisors

We tossed the deck boards and stair treads back in place, unsecured, until we could get new stringers put in later in the week. Turns out, nobody sells the size we had so we ended up putting in a 5 step staircase instead of 4 like the original. This was the easiest part for us because we didn’t actually do anything – Kyle’s dad came over while we were at work one day and put the new stringers in place for us (thanks again)! Using the 5 step stringers actually worked out really well because now they sit on the concrete walkway instead of in the dirt.

NewStringers

Unfortunately for us, we also couldn’t reuse the risers or treads, so our porch looked like that until we found the time and motivation to grab more lumber to finish it off. I’m sure our neighbors loved it.

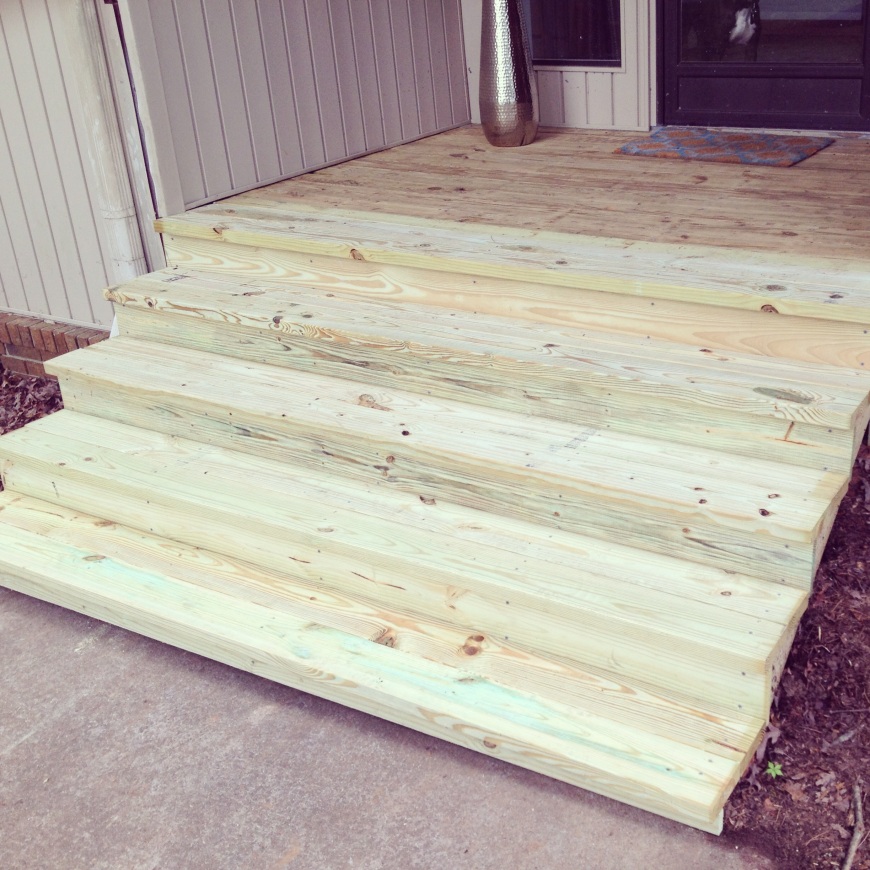
To put the porch back together, we just carefully measured and leveled each tread and riser and screwed the pieces in using decking screws. We also went back and put screws into the deck boards on the porch to secure everything. Here’s what it looks like now – we left a gap at the bottom for drainage since water likes to pool there:

PorchAfter

We’re planning on staining and sealing in the next couple of weeks. I would love to go ahead and do it now, but it’s super important to give pressure-treated lumber several weeks to fully dry out so that you don’t seal in any of the moisture which could cause issues like warping and can also cause your finish to bubble. We still haven’t decided if we’ll add hand rails back but for now we like it the way it is. In fact, once the staining and sealing process is over I think we can officially call this project dunzo.

The state of our curb appeal

June 26, 2014

I’ve always thought that one of the biggest reasons nobody bought this house for so long was because of the lack of curb appeal which in my opinion, is one of the worst reasons you could give. It’s so easy to pretty up the front of a house – even if you don’t change the actual exterior structure.

Over the course of the last year, we have done a couple of little things to improve the curb appeal of this house of ours. Last summer, we updated our lamp post and in the fall we gave our mailbox a makeover. We also ripped out a truckload of azaleas and put in a few Indian Hawthorns, a Knock Out Rose tree, and threw down some grass seed. Sadly, the grass seed only took in certain areas (partly due to heavy rains washing it away) but we’re stubborn so we’re trying again this fall – this time we’ll most likely put down a layer of top soil and we’ll try to get it done earlier than we did last year.

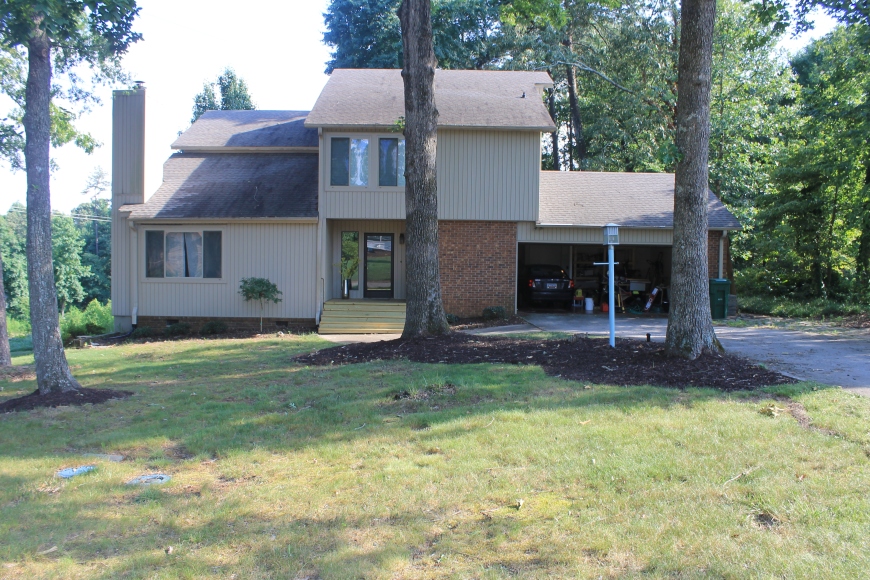
Here’s a view of the front of the house from the listing:

Front1

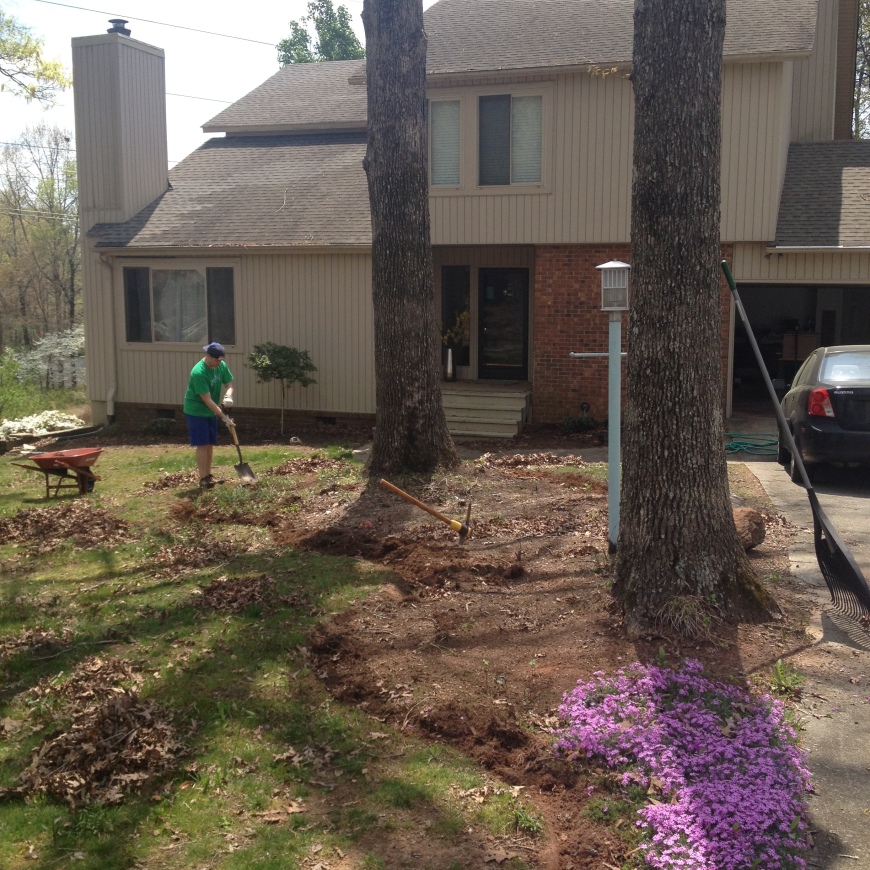
And if I’m not mistaken, here is the last picture I showed you guys of the front of our house (because I’m a bad blogger):

IMG_1589

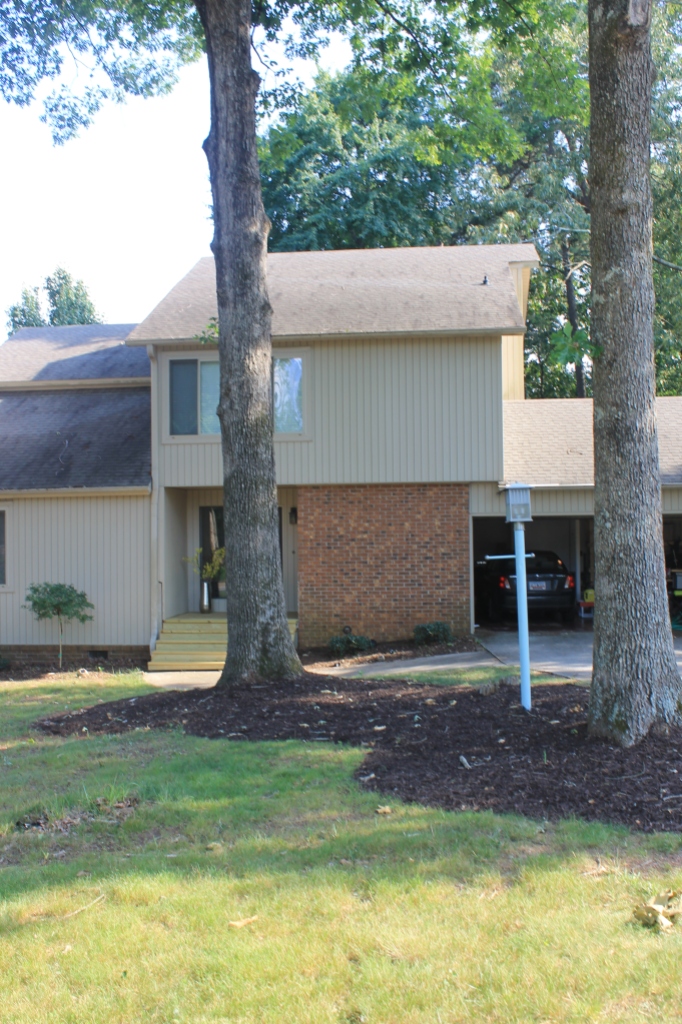
Well, this is how far we’ve come this year:

IMG_2981

IMG_2986

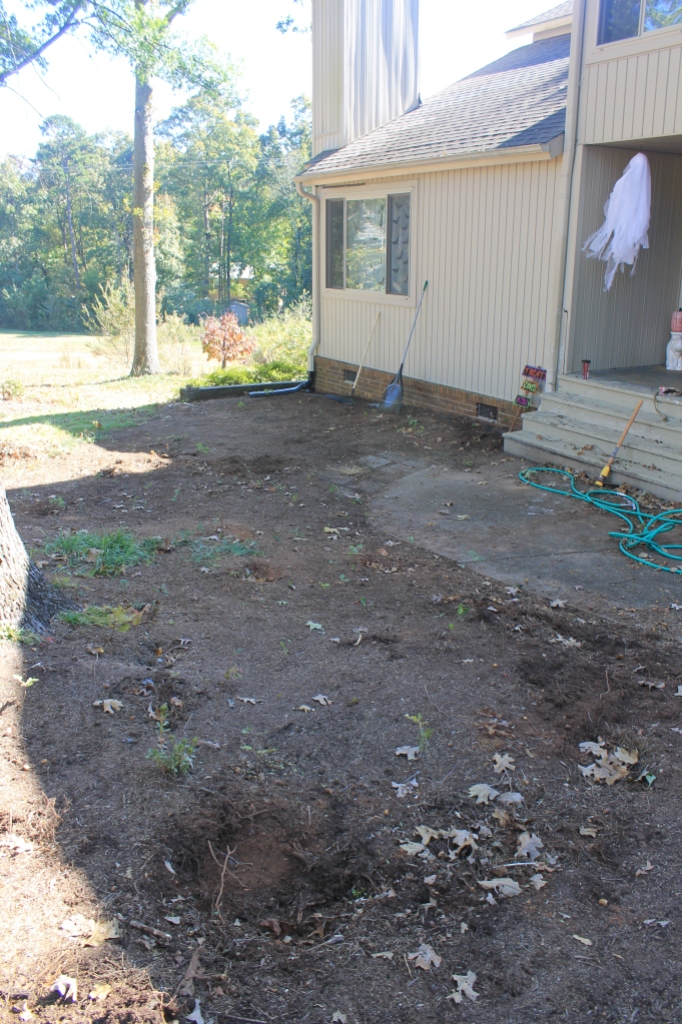
To be fair, these pictures were taken in different seasons so that alone makes a big difference. The mulch bed to the left of the porch still needs to be cleaned up and new mulch  needs to be added but it’s still better looking than it was this time last year.

The two biggest things we’ve done have been to add more mulch beds and rebuild our front porch. I’ll give a full run down and pictures of the porch soon but for now here’s our mulch progress – we’re still battling some falling sticks/branches and the vine system from Hell that keeps popping up all over the place:

mulch bed2

Edging

IMG_2982

Both of these projects have often been rewarded with Happy Hour trips to Sonic. I need a shirt that says “Will sweat for Nerds Slush.”

Slush

We’ve come a long way but as always, we still have a long way to go! We’d like to eventually add some stone edging to the mulch beds and we also need to regrade part of the lawn and re-mulch the beds we put in last year at the front of the house. We’d also like to continue tackling the crazy wild area off to the side (not pictured) and rip out all of the ivy between us and our neighbor. A good power wash also wouldn’t hurt, but once we wrap up our front porch project we’ll probably leave the front alone until next year, with the exception of re-seeding in the fall…and maybe snapping and going all Bruce Lee on that ivy but we’ll see.

Most of what we’ve done to the front has been purely aesthetic, but the front porch had to be rebuilt due to structural issues. I’ll tell you all about that next time, along with how it was fixed but for now here’s a preview:

rottenstringer

Why yes, that is a rotten stair stringer and no, it wasn’t the only one. Isn’t home ownership fun?!

True life: i hate our wall color

June 20, 2014

The first thing we did when we bought this house was remove all of our kitchen cabinet doors. This post has nothing to do with that.

The second thing we did was paint our entire downstairs some gray color that I don’t even remember the name of. We looked at swatches at Sherwin Williams, picked one we thought we liked, and bought a 5 gallon bucket. Then, we went on our merry way painting every wall the same color, we stepped back, and I hated it.

It’s. Purple.

Paint1

PURPLE.

Paint2

To be honest, it’s not an awful color, but it’s just not what I pictured. I’ve lived with it though, for the last year or so. Of course I’ve also been living with test swipes of other gray paints on several different walls, and yellow-beige walls upstairs because I’m too scared of making the wrong decision again.

Trust me, if you dropped money on a 5 gallon bucket of paint and then hated the finished product you’d be a little gun shy, too. Learn from our mistakes – when you pick out a new paint color take your time and test out as many samples until you find the right one. Try the colors in different rooms and different lights – make sure you find something that will work; find something that you’ll love, not something you can live with.

I think we finally picked a winner but I’m still hesitant. It’s not that I hate the task of painting – I really don’t mind it at all, but I’m scared of making another mistake. On the other hand, I’m also tired of pretending our test swipes are some cool, new abstract art movement whenever I give someone a tour of the house…

Here’s to hoping the next choice is the right choice and that I can convince myself soon that it’s okay to try again…

A new addition

May 23, 2014

Friends, meet Otter.

photo (33)

Otter is two years old and loves to cuddle. We’re not sure what breeds he’s made up of but what we do know is that he is cute and we love him.

photo (32)

We actually met Otter about a year ago through a local rescue and we immediately fell in love. Barley was just a baby though, and we definitely weren’t ready for pup number two. Since then, he has been adopted and we put him out of our minds. Recently, Otter was reclaimed by the rescue and it just so happens that we were looking for a playmate for Barley this time around. We had been trying to adopt a younger female dog but she and Barley didn’t get along so well when they met. As soon as we knew Otter was available again we set up a weekend to foster him to see how he fit in. Barley and Otter had gotten along the first time they met but since that was a year ago, we wanted to make sure they were still buds. Spoiler alert: they are best buds forever and ever.

photo (34)

We turned in our adoption application yesterday and tonight, Otter comes home to live with us for good. It will definitely be an adjustment period but we are so excited! Now if only we could get motivated to put in a fence…

DIY Tufted Headboard

May 15, 2014

I mentioned back in my post about our bedroom that I would give you guys a tutorial for the headboard so here it is! This didn’t turn out perfectly by any means but I think I have learned from my mistakes and I have an idea of what to do differently next time.

To get an idea of what to do, I used this tutorial from Thrifty Decor Chick. It’s pretty straight forward and I know there are a ton of other tutorials out there, too. All you have to do is use the google. Disclaimer: I strongly encourage using one of those tutorials instead of mine. You’ve been warned.

Step One – Figure out what size/shape you want. We used 1/2″ in plywood and decided not to do anything fancy with the shape of it. We made the headboard big enough so that we can still use it if we end up upgrading to a King bed down the road.

Step Two – Cut plywood (or MDF) based on the size and shape you chose.

IMG_2409

Step Three – Figure out how many buttons/tufts you want and where you want them – drill holes for the thread to pass through. If you don’t want to tuft the headboard you can skip this part.

IMG_2414

Step Four – Cut foam to size. We used mattress toppers from Target (just like in TDC’s tutorial).

image

Step Five – Forget to adhere foam to plywood with spray adhesive, causing the next step to be more difficult than it needs to be OR actually use a bit of spay adhesive to secure the foam so you don’t have to worry about it flopping around before you can wrap it.

Step Six – Wrap foam with batting or muslin and staple to the back of the plywood.

image (1)

Step Seven – Iron your fabric (or forget to iron your fabric and regret it later…see where this is going?) You could also do this as Step One and then you won’t have to stop mid-project to get it done, just make sure it doesn’t get all wrinkly while it’s patiently waiting for you to finish.

Step Eight – Wrap fabric around the batting and staple to the back of the plywood. If you have a patterned fabric, this is a little trickier because you’ll want to make sure the pattern stays straight…or maybe you’re a rebel and don’t care that your pattern is slanted. I won’t judge.

Step Nine – Go back and pull fabric tighter in some areas but not others and staple more. Tip: Don’t actually do this unless you want to end up cursing yourself and going back to remove some of the staples before saying “screw it” and carrying on anyway.

Step Ten – Use fabric scraps to make buttons. We picked up a kit similar to this one from Joann Fabrics and they turned out pretty well. Of course, it took me a couple of hours and destroyed my fingers because apparently I’m not very adept at button making.

image (3)

Step Eleven – Tuft. We used waxed thread and it was pretty easy to work with. My process was to satple one end of the thread to the back of the plywood, pass it through the foam, thread the button, pass back through the foam, and staple the other end a couple of times.

image (4)

Step Twelve – Mount the headboard on the wall…which we still haven’t actually done so I have no tips for you there.

Now here are some things I think went wrong:

1 – I did not iron the fabric. WHOOPS. This means there are some wonderful creases from where the fabric was folded after it had been cut as well as some wrinkles where the fabric wasn’t quite tight enough before I tufted. I mainly just hide them with pillows where I can.

2 – I didn’t know how tight to pull the fabric so I’m not sure if I pulled too tight or didn’t pull tight enough but I definitely wasn’t consistent with either.

3 – I didn’t know how tight to pull the buttons. I pretty much just pulled them until the tuft looked right. Again, not all of my tufts are the same but I’m not sure if that’s because I didn’t pull the fabric to the right tautness or if I wasn’t as consistent in the actual tufting or some combination.

Here is how our’s looks currently:

IMG_2931

Wrinkly – I guess that means it matches the rest of the bedding.

I have played with the idea of taking all of the staples out and trying again but there are probably over 100 staples on that thing so I decided against it. I figure it’s not so bad for my first attempt and I don’t mind how it turned out at all although I may try using some wrinkle releaser on it. We may end up making  a day bed for my craft room so I could always use it in there and make a new one for our room if it starts to bother me.

Still on tap to share with you guys is our night stand tutorial but I wasn’t involved in that build so I’ll have to have Kyle write something up!

April Wrap Up

April 30, 2014

Well, April is over and we weren’t nearly as productive as I had hoped but we were more productive than usual and that was really the point of this whole thing anyway, right?

The only things we were able to cross off the list for the last week and change were painting doors and starting on our front porch. I say started because (SPOILER ALERT) we ran into some issues so we couldn’t actually finish. Of course.

Anyway, until I get a better update here is a picture of how our porch was looking mid-afternoon on Sunday. It looks totally safe and not scary at all, right? Oh yeah, we also discovered that there is wood siding under our ugly vinyl siding. Who knew?

photo (31)


Week Three Recap

April 21, 2014

We’re three weeks down in our self-proclaimed month of productivity. Here’s how we did this past week:

WEEK THREE:

Edge drawers in closet – decided this isn’t necessary
Test living room wall treatments
Paint exterior of Half Bath and Laundry doors
Paint Cat Closet and Hall Pantry doors
Refinish dining room chairs
Refinish front door
Build patio table base
Buy/build stool for jewelry vanity
Mirror for closet – this needs to wait until we do the hall bathroom
Craft Room storage
Clean craft room
Mulch
Continue removing wallpaper in half bath
Dog food stand?
Fix dining room light?
Front porch steps?
Bench for master
Figure out what to do in master closet nook area

Yikes. It was just one of those weeks where we couldn’t get motivated. We’re sticking with this same list for Week Four and hopefully we’ll be able to get it done this time.

A room for adults

April 15, 2014

Don’t worry, I’m not talking about 50 Shades of Grey stuff here – get your mind out of the gutter. What I am talking about is a bedroom that looks like it belongs to adults instead of college kids.

Before we get into any progress pictures -(we’re not definitely not into “after” territory yet), let’s look at the before. Prepare yourselves for some ugly:

IMG_2382

IMG_2384

Pretty swanky, eh? Our bedroom was what I described as “Senior year dorm chic.” You know, when you go off to college you buy all new stuff to deck out your dorm room and make it look cute or edgy or artsy or whatever. When you go back for your sophomore year, you still have most of that but by then a pillow case has gone missing, miscellaneous decorations have been broken or torn, and you’re more worried about pulling your GPA back up and losing those freshman 15 than decorating your room. It’s still decently well put together but less matchy-matchy. Junior year follows the same formula but now your sheets don’t match, your towels are faded, and shot glasses are your tchotchkes of choice. Then, senior year hits and you end up between the stuff you bought as an eager freshman, the cheap crap you bought to replace the items you lost, and the brand new stuff you’re starting to accumulate to carry on to your first real apartment after graduation. It’s mixing old with new in the least attractive way possible.

This is what we’re working with now:

IMG_2926

IMG_2925

I can’t even tell you how much easier it is to relax in here. We are far from finished – if this was a marathon we’d be around Mile 4 (Don’t mind me, I just ran for 10 minutes straight without dying so I’m basically a pro now). One of the best things we did in here was remove the ceiling fan. I love having a ceiling fan in the bedroom but this one was so low and the placement was a little awkward.

IMG_2391

IMG_2939

I want to point out that I am not a fan of stark white walls at all; not even a little bit. That being said, I was having the hardest time picking a color. It’s like the yellow was fogging my brain and now that it’s a blank slate, I’m kind of digging it. You can still see the old paint color right below the ceiling but we’ll be adding crown molding eventually so it’ll be hidden. The jury is still out on whether we’ll pick a color or leave the walls white. Our room is pretty large and add that to the ladder tango I was doing to deal with the vaulted ceilings and the result was a pain in my butt. Actually, the pain was more in my hands, my neck, and my back but you know what I mean. It took right around 4 hours to do the first coat so I made Kyle help for the 2nd coat and it went a little bit faster.

We have a closet project in the works right now, and we knew this little closet wouldn’t actually be used for clothes so we’re turning it into a nook instead. It was easy enough to take the doors and track down but taking the shelf brackets off was a little bit of work. Not sure if we’re going to do shelves or artwork above the TV and we still need to paint the closet but I’m not sure if I want to do it white or use an accent color…or maybe even do something fun like a pattern? What do you guys think? That TV will eventually be replaced with a larger one, by the way. Santa has been talking about upgrading the one in our living room this year and if that happens, the living room TV will move here and this little guy will move out to the garage – we love having football/baseball on while we work.

IMG_2387

IMG_2934

The comforter is from World Market and had been freshly trampled on by Barley when I took these pictures. The sheets/blanket that you can’t see are from Target (Nate Berkus collection) and need to be replaced already – that’s the issue when you have a 65lb beast with sharp claws that likes to run laps across your bed. We’re still collecting pillows but I’m having a hard time finding exactly what I want – I don’t really like these yellow ones in here but for now they stay. The headboard was a project we tackled with some fabric from Jo-Ann, a Target mattress topper, and some plywood – I’ll post a tutorial soon but it’s not exactly how I wanted it. Not bad for my first attempt, though.

IMG_2393

IMG_2931

The lamps are also from Target and you can’t actually see them because my photography skills are so awesome. Kyle built the nightstands which I mentioned recently (tutorial coming soon for those, too!). These nightstands are currently being fixed from our stain mishap (you can see a sneak peek of the plan above) but we really needed them so that’s on hold. Eventually, we’ll move them to the lounge downstairs because we really want some nice natural wood pieces in here to warm it up a bit. We’ve already come up with plans for the new nightstands.

I think the room has come a long way already but we still have plenty to do including but not necessarily limited to:

-Add crown moulding and new baseboards
-New doors
-Closet nook – Paint? Shelves? Art?
-New curtain rod/blackout curtains
-Pillows!
-Seating area between the windows and doors
-Remove/replace bench under windows. The bench we have now is too small but not sure if we’ll want something there once the seating area is finished
-Build bench for the foot of the bed
-Do something about that lovely purple and green boxspring
-Raise bed
-New sheets
-Figure out what to do on the long blank wall on the other side of the bed
-Figure out what to do with the dog kennel and bed

The progress is slow but at least there is progress. I’ll take it.


Working hard or hardly working?

April 14, 2014

We are already halfway through April. I felt pretty good after Week One but I feel like we didn’t get a lot done last week and we ended up bumping a bunch of projects for one reason or another. Here’s how we did for Week Two:

WEEK TWO:

Salvage nightstands – half done, kind of. Our need for nightstands outweighed my desire to make them pretty for right now. Function – 1, Looking Pretty – 0
Rebuild drawers
Paint drawers
Install drawers
Edge shelves in closet
Finish cleaning closet
Clean craft room – Started. We moved an old mattress out and had Salvation Army pick it up but we don’t have anywhere to move all of Kyle’s clothes right now.
Finish dog food stand – Stalled. I don’t like how it was turning out so I’m coming up with a new plan.
Finish mulching around Dogwood tree by driveway – Started but we ran out of mulch. Turns out so did every single Lowe’s in our area and I’m very picky about the color of our mulch. I’ve only found one brand I like and we ordered twelve bags yesterday. Should be here Wednesday.
Rake front yard
Touch up first closet unit – decided to wait until we finish the rest of the closet
Paint half bath door – Started. Painted the inside, still need to paint the outside.
Paint laundry door – Started. Painted the inside, still need to paint the outside
Paint kitchen coffee shelf
Fix dining room light
Remove wall paper in half bath – This will take approximately the next eight years of my life.
Edge and mulch other side of driveway – Half done. Kyle got the edging done but we had to order mulch (see above)
Fix front porch steps – Decided to wait on this
Remove trim in shoe closet
Paint closet in Master bedroom – Not started because I’m reevaluating what I want to do here.
Build bench for foot of bed
Paint hall bath – Decided to wait on this until we can tackle the whole “mini makeover” for this room
Refinish mirror for hall bath – Decided to wait on this until we can tackle the whole “mini makeover” for this room

And here’s our plan for Week Three. I already know we won’t be getting this finished because I kind of forgot Easter is this weekend which means we’ll lose a day but I’ll just have to tweak the schedule later!:

WEEK THREE:

Edge drawers in closet
Test living room wall treatments
Paint exterior of Half Bath and Laundry doors
Paint Cat Closet and Hall Pantry doors
Refinish dining room chairs
Refinish front door
Build patio table base
Buy/build stool for jewelry vanity
Mirror for closet
Craft Room storage
Clean craft room
Mulch
Continue removing wallpaper in half bath
Dog food stand?
Fix dining room light?
Front porch steps?
Bench for master
Figure out what to do in master closet nook area

I am purposefully scheduling a large amount of projects, because that’s what I do. It’s easier for me to have too much to do and have to move things to the next week than have too little and try to figure out where to go from there. I’m a weirdo, yes, but it works for me…well, most of the time anyway.

And because I think it’s always nice to have some visuals, here is a little before and after of the coffee shelf (painted with Benjamin Moore’s Hale Navy – color matched by Sherwin Williams) and some in-progress shots of our front yard landscaping adventures. I’m really sorry about the blurriness of the coffee shelf “before” picture. Yikes.


Coffee Shelf before

This is how we kept our cats out while it dried:

Coffee Shelf During

After:

Coffee shelf After

Mulchless, weedy mulch beds:

mulch bed2

Mulch bed before

  • « Previous Page
  • 1
  • …
  • 15
  • 16
  • 17
  • 18
  • 19
  • …
  • 22
  • Next Page »

About

the house on the hill blog
Southern made. Lover of animals. Married to a New Englander. Slowly renovating our 1970s home.
Read More

Archives

Copyright © 2025 · Coffee & Dreams Theme by Themes Hub

Copyright © 2025 · Coffee and Dreams Theme on Genesis Framework · WordPress · Log in


Loading Comments...