The House on the Hill

Renovating a house from the 70s in the South.

  • Home
  • About
  • Get In Touch
  • House Tour

April Projects – Week One Recap and What’s on tap for week two

April 7, 2014

We’re about a week into April so I thought I would recap what we did and didn’t get done from our Week One to-do list and then put Week Two out there into the universe to see if we can make it happen.

WEEK ONE RECAP. I’m not going to go day-by-day on this because we ended up going off schedule a bit:

Paint front side of closet drawer pieces
Stain first nightstand – Attempted and failed. New plan in the works for Week Two
Assemble first closet drawer (already painted)
Paint back side of closet drawer pieces
Stain second nightstand
Change outlets and light switch in closet
Add edging to first closet unit
Clean out craft room
Assemble remainder of closet drawers
Install jewelry shelf in closet
Cut and paint shelves for closet unit
Cut and paint trim for first half of closet
Clean out closet (tools, old outlet covers, nails, debris, etc) – Half done. Still need to vacuum and remove tools.
Seal coffee table
Build dog food/water stand (paint? stain? Poly for sure) – Half done. Most of the pieces are assembled. Need to borrow hole saw.
Raise curtains in study and dining room
Clear garden box – Decided to wait until we get a weed eater.
Edge/mulch tree by driveway – Half done. Need one more bag of mulch to finish.
Plant new mailbox flowers
Make jewelry blocks
Rake leaves?
Install shelves in closet
Install trim in first half of closet
Touch up first closet unit
Touch up trim – Decided to wait until second half of room gets trimmed out so we can do it all at once.

So, I crossed off painting and building the drawers because we totally did. BUT we had another DIY Fail and we pretty much have to start from scratch. It sucks and I hate having to re-do work but it’s necessary if we want them to actually look nice and work the way they need to work.

We didn’t check everything off the list for week one but I think we did a pretty good job. Now let’s look at what we have planned for this week.

WEEK TWO:

Salvage nightstands
Rebuild drawers
Paint drawers
Install drawers
Edge shelves in closet
Finish cleaning closet
Clean craft room
Finish dog food stand
Finish mulching around Dogwood tree by driveway
Rake front yard
Touch up first closet unit
Paint half bath door
Paint laundry door
Paint kitchen coffee shelf
Fix dining room light
Remove wall paper in half bath
Edge and mulch other side of driveway
Fix front porch steps
Remove trim in shoe closet
Paint closet in Master bedroom
Build bench for foot of bed
Paint hall bath
Refinish mirror for hall bath

I actually think this week will be less work than last week but we’ll see. I had all of this stuff planned out day-by-day but Barley decided to eat that sheet of paper while we were in the garage.

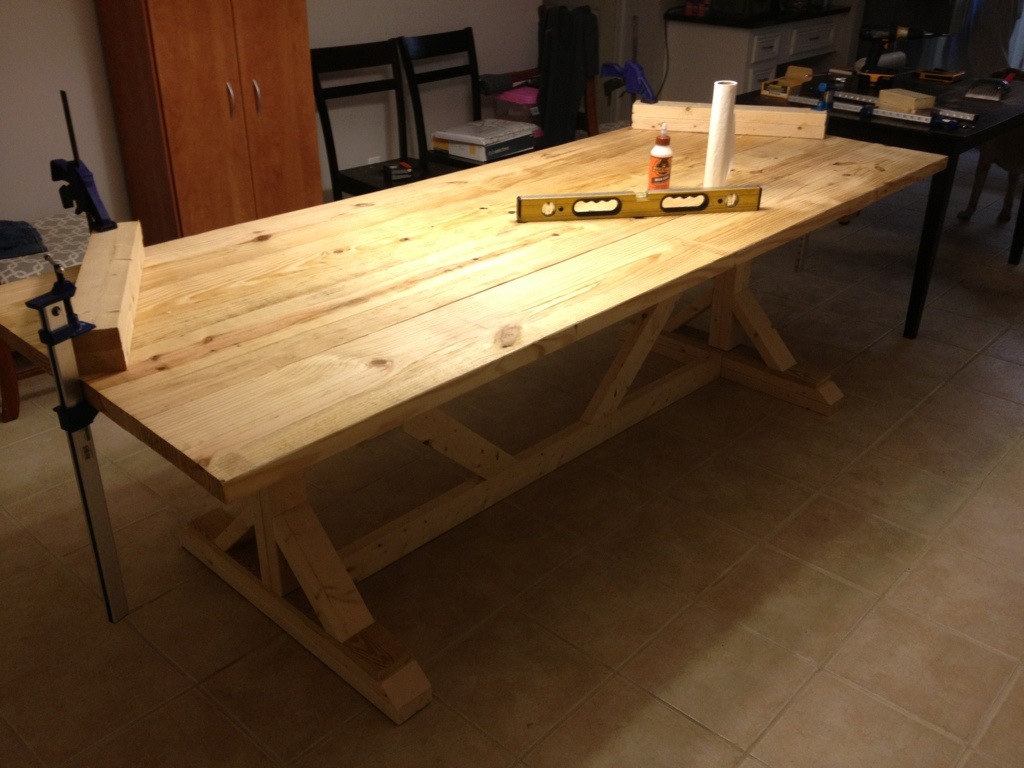
And because there aren’t any pictures of our progress, I’ll at least leave you with this sneak peek that I posted on Instagram earlier tonight:

aprilweekonesneakpeek

DIY Fail

April 6, 2014

It’s no secret that Kyle and I are big into DIY. It’s also no secret that we’re still kind of new to it and we don’t always end up with a finished product we’re in love with. I’m about to share with you a bad DIY. Baaaaaaaaad, bad, bad. It’s actually kind of embarrassing but I think it’s important to share our failures as much as we share our successes. Nobody is perfect and it would be exhausting to try to come off that way.

I mentioned that Kyle built a couple of nightstands for us. We love these nightstands. The nightstands themselves are not the embarrassing part.

Let’s talk about stain for a minute. At this point, we’ve had several projects that involved stain and they’ve all turned out pretty well as far as we’re concerned.

Pro tip: do your research. I’m sure you can see where this is going…

Normally, we just grab pine from the lumber section for building furniture because we like the look of it and it’s relatively cheap. For this project, we went with edge-glued aspen project boards from Lowe’s because they’re flat and easy to work with. I figured they would take stain just the same but spoiler alert: I was wrong. So very wrong.

Nighstand stain3

nighstand stain2

We prepped the surface with wood conditioner and then applied the stain and it looks…well, not great. It’s extremely uneven and the brush strokes are crazy bad.

stain1

After letting out my frustration via some highly inappropriate language and consulting with the Google, I discovered that I wasn’t alone. While these project panels are stain grade, they just don’t take stain as nicely as what we’re used to working with. Had we done our research, we would have most likely opted to use different materials or read up on the best way to stain this particular wood and then we would be using the nightstands. Sadly, we made some assumptions and are continuing to use a filing cabinet and a trunk by our bedsides. It kind of feels like we’re living in a dorm room.

We do have a plan to salvage what we have but they won’t be going in our bedroom. This means another trip to Home Depot to get the flattest lumber we can find. Oh, and it also means Kyle has to figure out how he built them in the first place since he did it sans project plans.

In other news, we’ve been mildly productive this week but we had another DIY fail that I’ll talk about later. Let’s hope this weekend is more successful.

April: The month of productivity

March 31, 2014

I keep telling myself I’m going to blog regularly but then I don’t. To be fair, we haven’t done a ton of stuff around the house since I’ve been missing.

Yesterday, I decided to make a list of all of the small – medium size projects we keep putting off and today I have decided that for the next four weeks, we will cross as many of these off our list as we can.

list

The list actually spans two full pages and I’m sure I forgot some things. As I looked over the list while taking a little break at work, I decided to start scheduling out projects. As luck would have it, I have 4 highlighters at my desk which means that I can break projects down into groups of 4. Months seemed a little too overwhelming since the lists were so much longer, so I decided to go with four weeks. And wouldn’t you know it, here we are just about to start a new month so I decided to declare the month of April as the month of productivity. Kyle argued that April = April Ludgate = least amount of productivity possible. For anyone who isn’t a Parks and Rec fan, you probably won’t understand that and you should also go get comfy on the sofa and binge watch all of the seasons that are on Netflix. Worth it.

Anyway, clearly I won that argument. Let’s keep in mind that some of these “projects” are as little as switching out our almond colored outlets for white ones or raising our curtain rods while one project involves removing a wall and raising a ceiling. My plan is to post the project schedule for each week on Monday and keep you updated throughout the week or maybe just do a big roundup at the end of the week depending on the project. Let’s keep in mind though that while I am supremely amazing at making plans, I am also exceptionally awful at following through.

That’s enough rambling for now. Here’s what’s up for Week One. Oh by the way, we’re in the middle of a big closet project and Kyle built a couple of awesome nightstands for our bedroom…which has also been painted…and dressed up a little bit. More to come, I promise!

Monday
Paint front side of closet drawer pieces
Stain first nightstand
Assemble first closet drawer (already painted)

Tuesday
Paint back side of closet drawer pieces
Stain second nightstand
Change outlets and light switch in closet
Add edging to first closet unit

Wednesday (assuming we don’t have game night)
Clean out craft room
Assemble remainder of closet drawers
Install jewelry shelf in closet

Thursday
Make up for Wednesday if we do have game night

Friday
Rest

Saturday
Cut and paint shelves for closet unit
Cut and paint trim for first half of closet
Clean out closet (tools, old outlet covers, nails, debris, etc)
Seal coffee table
Build dog food/water stand (paint? stain? Poly for sure)
Raise curtains in study and dining room

Sunday (weather permitting)
Clear garden box
Edge/mulch tree by driveway
Plant new mailbox flowers
Make jewelry blocks
Rake leaves?
Install shelves in closet
Install trim in first half of closet
Touch up first closet unit
Touch up trim

Yeah, so here we go. Maybe I should make some sort of deal with myself like if we finish all of the things we have planned we get something awesome? Maybe? Hm.

DIY Farmhouse Table

February 10, 2014

Yep, we built a table. Well, Kyle built a table and I sometimes held things and loudly voiced my opinion. Want to see?

IMG_2418

I’m in love.  As with all projects around here, this one took us a while to get started on. We actually bought the lumber months ago (over the summer, I think) but didn’t really start on it until November and then we finished it up a few weeks ago. Sorry, but you know, life and other excuses.

Let’s get real for a minute – our old dining room table was a joke. I bought it used off a fellow student in college for a whopping $125 for the table and chairs. After that, it sat in storage for 6 months and then we used it heavily. It was a cute table but it wasn’t really a quality piece. In fact, it’s pretty close to falling apart as we speak…of course I’m sure it didn’t help that we used it as an indoor/outdoor table when it was clearly never made to spend even a nanosecond in the elements. We maybe left it out in the rain and hot southern sun once or twice (or maybe like every single day for 3 months of soggy, humid summer).

IMG_2050

IMG_2052

It was never a question that we would eventually be getting a new table but I wasn’t sold on our abilities to build one at first. That changed when I started looking for a new table to fit what we wanted (8ft, a little rustic, built to last) and I couldn’t find anything that didn’t break my little frugal heart into a million zeroes.

Naturally, I turned to the good ole Google for a little help.

Can we all just give thanks for Ana White right about now? She’s pretty much my favorite person these days. Do you want to build some furniture? “Oh I don’t know, what kind of furniture?” It doesn’t matter. Seriously. Just go look on Ana’s site and you’ll probably find plans for it. I love having plans to follow. Crossing off steps of a process or an item on my to-do list is like some weird kind of therapy for me. I loves it. This wasn’t even my to-do list and it still thrilled me to no end.

We chose to go with the 8ft length because that’s what we wanted anyway and the planks were sold in that exact measurement so it made it pretty easy to just keep them as is. You can always mess with the measurements a bit if you want a smaller or larger table. In the end, we decided to go back with some wood filler between the cracks so that the surface was a bit more solid since some of our cracks were a little wider than we would have liked. This is the one thing I absolutely would have done differently with this table – either skip the wood filler and leave the cracks or build the top differently to minimize the cracks. We knew the filler would take the stain a little differently but to be completely honest, that’s the one thing about our finished product that I’m not happy with. 

IMG_2419

I will admit that we fudged a little bit on this table because some of the measurements on our legs were a little off, leaving some pretty wide spaces. We just shoved in some shims, snapped them in place, sanded, filled, sanded some more, and then stained with the rest of the table. I don’t think it’s that big of a deal, especially since nobody is going to be shoving their face right against the legs all the time. And if you do that, I’m going to think you’re a little weird and your invitation to our next party might get lost in the mail…

IMG_2421

The last thing we did was to apply pre-stain conditioner and then stain the sucker. We tested a few different stains and ended up with one coat of Minwax Special Walnut. The final step will be to seal it. We haven’t done that yet because we aren’t sure if we’re happy with the finish or if we want to do another coat. We’ve been putting it off but I think this may be the week we finally either do a second coat or seal it. As you can see, the rest of the room is still a major work in progress.

IMG_2420

Now we just have to work on refinishing some chairs and figure out the rest of the room. Seeing this makes me wish I could take a hammer to all of that tile but sadly new floors aren’t in this year’s project budget so for now I’ll just have to continue to creepily whisper “patience” to myself every time I walk into the kitchen and dining room.

DIY Garage Shelves

January 15, 2014

In case any of you are interested in building your own set of shelves, I’ve put together this tutorial to walk you through it. I promise it’s easy!

Let’s start with the cut list (Note: This is all based on our unit which measures 7ft tall x 8ft wide and 2ft deep):

18 2×4’s – we cut these ourselves using our mitre saw but usually both Lowe’s and Home Depot offer cutting services for free or cheap
-6 cut to 7′ lengths
-4 cut into approximately 20″ lengths (for a total of 16 20″ pieces)
-8 left alone (8ft lengths)

2 sheets of 4×8 plywood (we went with the cheapest we found and left them raw but there are certainly prettier options if you prefer or want to finish them nicely. We had these ripped long ways at Lowe’s because it was easier for us.)
-Cut into 2×8 lengths (so you’ll end up with 4 sheets of plywood)

Other materials:
2 1/2 in screws
Drill
Mitre saw (to cut 2x4s to length)
Jigsaw (to notch plywood)

First, we built all four frames for the shelves. To do this, you secure 4 of the 2ft boards between two of the 8ft boards like so:

shelfframe

Next, we secured one of the sheets of plywood to one of the frames to make the top shelf. We could have waited on this step but figured it was easier than having to break out the ladder and do it once the unit was up. Then, we laid out all four frames and started attaching our legs. We decided it would be easiest to build the unit on the ground perpendicular to the wall it was going on so that we could just lift it into place. The legs will go into the four corners as well as the middle- we secured them to all four frames.

unitwithlegs

Then, we hoisted her up and scooted her into place. It was important to us that this be very secure – nobody wants to be attacked by a large, heavy shelving unit when they get home from work. To make sure that it wouldn’t be doing any swan dives, we wanted to secure it to the studs in the wall. Our garage is trimmed out around the base so the best way to do this was to attached two cleats to the wall using scrap wood – making extra sure we hit the studs (we used my awesome new stud finder and then drilled some pilot holes into the wall to double check).

cleat

Then, we just screwed the unit into the cleats. I stood up on the bottom frame and hung onto a leg without the unit budging at all.

The worst part of the project was notching out the plywood which is the next step here. Kyle measured the distances between legs and from the outside of the frame to the back of the legs to figure out how much needed to be notched out. He marked all of these measurements on the plywood and used his jigsaw to cut in. Unfortunately, it took us about 4 attempts to get the first one to fit. After that, it wasn’t nearly as bad – we just learned to cut out a little bit more than what we marked.

The last step is to just attach the plywood to the frames – I did two screws on each end. I left the middle along because it seemed to sit pretty flush by itself but feel free to add some more screws.

IMG_2375

Ta Da! Load up those shelves and then reward yourself with a beer or a nice glass of ice water.

Tackling the Garage

January 13, 2014

I cannot even believe I’m going to share these pictures with you but for the sake of showing you how badly we needed a storage solution, here goes. Just like ripping off a band-aid.

Welcome to the jungle (made up of junk, half finished projects, tools, seasonal decor, landscaping tools, more junk, and some other crap):

IMG_2369

IMG_2370

IMG_2371

That’s not even the worst part. Ready? Are you sure?  The worst part is that it used to be so much worse. I KNOW. It’s awful. And it’s been this way pretty much since we moved in last Spring. Organization was not a priority for us in 2013, obviously. That’s all changing; 2014 will be the year of organization! The garage is the first of the large beasts to be tamed but don’t worry, we still have plenty to take care of inside – embarrassingly messy photos included.

I decided on or soon before New Year’s Eve that as of January 1, we would finally be able to park in the garage for the first time. We got halfway there before we realized that we couldn’t actually deal with the other half. Why? Oh, nothing big only we didn’t have anywhere to put anything at all. Womp, womp. So the deal was the I would start parking in the garage (Hallelujah!) and we would build a storage system over the weekend.

Enter: DIY garage shelves.

IMG_2373

IMG_2375

Okay, so they aren’t very pretty but dang they’re functional. I’ll give you guys the rundown on these soon but I figured it would be better to put them in their own post. They weren’t too difficult to build – the worst part was the crappy drill bit we had and the inevitable measure 40 times, cut 97 times when we got ready to install the plywood.

Not only were the shelves totally necessary but it meant I would get to try out our new baby aka my favorite tool ever: the mitre saw.

As soon as we had them secured to the wall, I started loading them up while Kyle worked on the other organization project we had going on which I hope to share next week!

Once the shelving unit is finished and loaded up, we were able to get the garage cleaned up enough to park both of our cars in there. It’s a 2014 miracle!

IMG_2397

We’re not done with the garage by a long shot – there’s still plenty to clean around the edges and we have materials for our next big project lurking about but it’s one heck of an improvement over what it was.

I’ll be posting a tutorial for the shelves later in the week and then I’ll finally be sharing our dining room table! We stained it over the weekend but we’re waiting a couple of days to make sure we like the finish before sealing and sharing.

Living in a kitty paradise

December 22, 2013

To say our animals are spoiled would probably be the biggest understatement of 2013…or possibly of the entirety of the history of the universe. They all get plenty of love and affection, copious amounts of treats, and a nice big bed to sleep in-no matter how uncomfortable a position we have to sleep in to accommodate them.

Well, now our cats have yet another item to brag about to the squirrels they taunt outside the living room windows: their very own room. Okay, so it’s not really a room, it’s a closet, but I think that’s probably more than the squirrels have anyway. When we first looked at this house (almost a year ago!), one of the first things I noticed was the abundance of closets downstairs. Who doesn’t love storage space, right? The nice thing about having so many closets is that we were able to sacrifice one for dedicated cat space.

The first thing we did in here was install a cat door and push the litter box in. I cannot tell you how nice it is to not have to share my bathroom or laundry room with cats which is what we’ve done in the past. At our apartment, the litter box stayed in the guest bathroom but if we had people staying with us, it would have to be moved into our bedroom and then back again. At the rental house, our messy little hellions always covered the laundry room floor with litter which was never fun to step on. Having a dedicated space for them might possibly be one of my favorite features of our house – spoken like a true cat lady.

Anyway, getting back to the real point of this post, the second thing we did was rip out the carpet. Y’all, this closet smelled rank. We’re pretty sure the water heater used to live in this closet and that it leaked at some point so one day when we couldn’t take it anymore, Kyle ripped out the carpet and tossed it in the garbage (technically he tossed it in our garage and it sat there for weeks, but I digress). We had a box of leftover tile that the previous owner’s stowed away in another closet, so Kyle put them down temporarily (no mortar, no grout, just laid them loose to have some kind of flooring) and tossed a rug on top.

IMG_1921

Fast forward 8 months, and I decided to finally do something about this sad little space. Mostly, it was because I was tired of staring at the eye sore of a cat tower living in our entry and wanted to somehow put it in the closet and I figured if I was going to do that, I may as well do what I could to make it a comfortable place for them to hang out.

So, one late Sunday afternoon, I decided to tackle this project while Kyle worked on our new table (Eeeeek can’t wait to show it off! Still have some staining to do but soon, I promise). Well, color me surprised, when I took out the rug and tile and found that while the carpet had been removed, the carpet pad was still there…silly husband. I thought that once I got this out and let the closet air a bit, the smell would start to go away.

Yeah, no. As soon as the carpet pad was up, I discovered a really disgusting subfloor. We looked into our options and decided the best thing to do was to prime over the subfloor, cover it with plastic, and then lay new plywood (of which we had just barely enough already sitting in our garage) on top of that for the new flooring. You guys, this closet still has an awful smell (and not a “two-cats-use-this-room-as-their-bathroom smell”). I’m thinking eventually I may go crazy enough to just rip everything out start from the studs and joists but by the time I realized the smell wasn’t going away, I was already too far in.

This post is getting crazy long so I’ll just give a quick overview of what I did:

1) Laid peel and stick tile flooring. This was super easy – I just found the center of the closet and started laying the tile there. These were easy to score and break when the situation called for it. Eventually, this closet will have hardwood flooring but that won’t be for at least a year and this box of tile was $20 so we figured it was worth it to have something other than raw plywood. I wasn’t particular with the edges since I knew we would be installing quarter round and the scratching wall.

IMG_1973

IMG_1976

2) Scratching wall. I ordered a sisal rug off Amazon for $35 (Available here, if you’re interested). I used an entire roll of velcro that I picked up at Home Depot (or Lowe’s maybe?) to adhere it to the wall. It’s been almost a month and so far so good. We’ll probably rub some catnip into the rug for extra attractiveness.

IMG_1981

IMG_1982

3) Climbing shelves. The three carpeted shelves were part of the cat tower I mentioned earlier. I just disassembled the tower (which was a pain and a half – there must have been at least 100 staples) and with a lot of difficulty, we secured them to the wall using brackets. Spoiler alert: we couldn’t find any studs so dry wall anchors were our saving grace here.

4) Storage/organization. The storage bins on the top shelf are from Target and are used to house the food, treats, and miscellaneous cat supplies respectively. The rest of the shelves that were originally in the closet are currently living in our garage. Now all we need to do is buy a bag holder (we used to have one and it was super convenient) and either buy or build a holder for the litter scoop.

5) Lighting. I (with the help of Kyle) removed the old exposed bulb and exterior box, and installed a new light fixture. I wanted to get rid of the ugly bulb but didn’t want to spend a lot of money. This guy was less than $20 from Home Depot. There’s no switch, and it was a little more work than I thought it was worth to wire one, so we just installed a remote (just like we did with the dining room light). This was the first time I’ve ever done anything electrical and it wasn’t as hard as I thought it would be but there were some frustrations.

IMG_2009

And just for good measure, here’s a before and after, complete with MS paint edited litter box. It was clean but I still felt like it would be better to cut it out for good measure.

IMG_1921

catclosetafter

I’d say when all was said and done, this was definitely worth the <$100 we spent to make it happen.

Happy Thanksiving!

November 27, 2013

We’re getting ready to spend some quality time with family but I wanted to pop in quickly to say Happy Thanksgiving!

I’ll have some fully fleshed out posts soon but in the meantime, here are a couple of sneak peeks of two projects I mentioned in the last post!

20131127-124835.jpg

20131127-124854.jpg

Hope you all enjoy the holiday!

Project Update

November 17, 2013

Dropping in to give a little update on where we are and where we are going from here.

1 – Landscaping.

Image

The weather has been all over the place lately and we haven’t spent much time working outside. We got our grass seed down, and our new foundation plants in but that’s pretty much it. We’ve decided to hold off on a few things until the spring, namely installing edging and putting down our mulch beds. We did mulch around our new foundation plants, but we will be putting down more after we install the edging in the spring. We’ve also decided to hold off on refinishing the front porch. Turns out we have some rot we have to deal with and things need to be replaced so we felt like it makes the most sense to wait until the spring since we’re getting ready to dive into the holidays and we’ll be short on time, money, and patience.

2 – Painting.

Image

Yep, we’re finally going to start re-painting our grey-purple downstairs! We thought this would be a good winter project since we’ll be trapped inside anyway. The bad news? We discovered a while ago that the whole house (we think) was actually covered in wall paper which was painted over by the previous owners instead of removed. Some of it seems to be started to come off the walls so we decided to make things right which means removing all of the painted over wall paper. I can’t imagine this is going to be fun and I’m sure more than a few inappropriate words will be shouted.

3 – Kitchen Tile.

Image

We picked up the tile to start our backsplash! We thought this would be another good winter project for us. 

4 – Master Closet.

Image

I’m not giving away any details on this one. Just know, I am very excited.

5 – Dining Table.

Image

Several months ago, we purchased lumber to build a new dining room table. Our old one is pretty shot and I bought it from a fellow graduate at the end of senior year so it wasn’t really a quality piece (and I’m sure leaving it on our porch for several months in ridiculous monsoon conditions didn’t help…whoops!). Well, we finally started on it! We’ve been working on the table top today and we still have a lot to do but so far we’re really happy with it. 

6 – Cat Closet.

A closet for our cats. Currently in progress and 1000% more frustrating than I thought it would be – is anyone surprise? Not really? Yeah, that’s what I figured.

We’re in the middle of both the dining room table and the cat closet and hope to have them both finished in the next week and a half or so. We probably won’t work on much else until after Christmas but I do still plan on posting at least once a week. In fact, I have lots of kitchen things to discuss (whaaaaaat?!) and I plan on doing some more seasonal decorating right after Thanksgiving so I’ll be sure to share what’s going on there. 

Adventures in DIY Landscaping Part One: The Plan and What We’ve Done So Far

November 3, 2013

Now that the temperatures are cooler and we don’t break into a sweat as soon as we walk out the front door, we decided to turn our attention to the front yard. We don’t have a huge lot, but at almost half an acre it’s still a big job so we’re just focusing on the front yard this year.

IMG_0538

It’s not so bad in that picture but in real life it’s kind of rough. The azaleas were out of control. Plus, they look pretty gross once the blooms die (which was about 2 weeks after they bloomed). This is kind of what we’re planning:

front yard plan

What you don’t see here is the mailbox area which we’ve already taken care of. We even updated it last weekend since the mums we originally put down were looking a little rough:

IMG_1548

Our biggest goal for this project is to try and get some grass to grow which according to the previous owners is an impossible task. I don’t like to be told I can’t make something happen so we’re going to throw down some grass seed anyway. Plus, I really, really, really hate pine straw. It’s everywhere and I hate it and I want it gone!

When we started, we were working with patches of grass, weeds, moss, dirt, a crap to of pine straw, and dead leaves; not to mention at least 15 overgrown, scraggly azalea bushes. Pretty. Last weekend, we managed to rake most of the pine straw and leaves out (which, by the way, was a huge pain and I let more than a few colorful words slip…loudly. Sorry neighbors, you may want to throw some earmuffs on your little ones when you see me don my floral gloves and grab the rake). It took hours of work both Saturday and Sunday and over this past weekend, we had even more leaves to rake up.

IMG_1589

We also spent hours digging holes for our new foundation plants. I told Kyle I refuse to plant anything new when we rip up the backyard because spending hours digging six holes is just not cool, man. We put in some Indian Hawthorns and a Knock Out Rose tree to help break up the big blank space to the right of the window (thanks to my awesome in-laws for that idea!). They all look a little weak right now but eventually, they’ll be big and beautiful and they won’t make Miss Barley sick like the azaleas did.

sickbarley

This past weekend, we were able to get the grass seed on the ground, do a bit of grading, and mulch around the new plants. We still have to buy and lay down the pavers before we can finish mulching but I’m just thrilled to have the grass seed done. Now we just have to sit back and see if it takes!

I’ll be back to show our progress early in the week and then later in the week I’ll give you a few hints about some upcoming projects we’re gearing up for

  • « Previous Page
  • 1
  • …
  • 16
  • 17
  • 18
  • 19
  • 20
  • …
  • 22
  • Next Page »

About

the house on the hill blog
Southern made. Lover of animals. Married to a New Englander. Slowly renovating our 1970s home.
Read More

Archives

Copyright © 2025 · Coffee & Dreams Theme by Themes Hub

Copyright © 2025 · Coffee and Dreams Theme on Genesis Framework · WordPress · Log in


Loading Comments...