The House on the Hill

Renovating a house from the 70s in the South.

  • Home
  • About
  • Get In Touch
  • House Tour

Expecting the unexpected

July 29, 2013

Given how much HGTV I have watched in my life, you would think that “expect the unexpected” would be my motto. You, my friend, would be so very wrong because the last thing that I expected to expect unexpectedly (did you follow that?) was mold. Yep, the “m” word that sends shivers down the spines of homeowners everywhere. I don’t know why the thought didn’t cross my mind (please try to contain your disappointment Hilary, Jonathan, and Scott) but I was completely caught off guard. 

Let’s rewind a bit so you can get the full story. One night last week, after tasting some beer and scarfing down some sammies, we decided to be productive and remove the old toilet in the half bath so that I could finish getting all of the tile and mortar out. We figured we could get everything cleaned out so that Saturday morning we could patch and paint before starting the new tile floor.

Image

Removing the toilet was actually way easier than I thought it would be – this must have lulled me into a false sense of security.

Image

As I started to remove the last wall and a half of tile trim, I found it. A whole village of mold expanding almost the full length of one wall and half of another. Luckily for us, it seemed to be contained to the bottom few inches of drywall. After sending pictures to a contractor friend of ours, we headed to Home Depot to buy one of these lovely respirators. At that point it was almost 10:00 on a weeknight so we decided to attack the wall with bleach for a little piece of mind until we could tackle the problem in full force.

Image

Over the weekend, we finished taking all of the tile and mortar out and then cut out a wall and a half of drywall going up as far as 4ft so that we were extra sure we got it all. We then sanded anywhere that had been in contact with the moldy drywall and used some Kilz primer over it for good measure. 

Image

We were lucky enough that the cause was the old toilet not being properly installed so at least there was no leak that needed to be found and fixed. Unluckily, we ran out of time over the weekend so the time line for the project is a little longer than we had hoped. 

Here’s to hoping that it’s all worth it in the end and we don’t royally screw something up!


Surprise, Surprise

July 26, 2013

So about those surprises I mentioned the other day…

Image

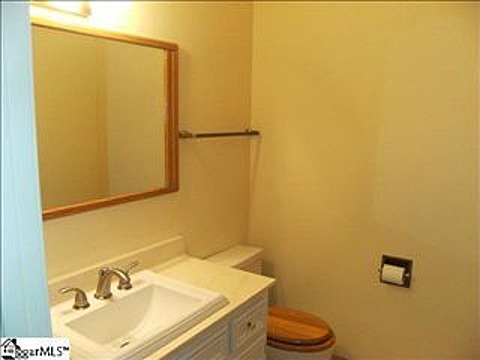
I’m sure you’re all thinking, “What the heck am I looking at?” That, my friends, is our awesome half bathroom complete with faux wood toilet seat, oversized vanity, brass light fixture, and pink-ish/purple-ish tile. Here, let me help you visualize the space just a bit better.

Half Bath Original

I’m sure this style works for some people but it ain’t us. So, while Kyle was out of town over the weekend boozin’ it up at a bachelor party, I decided to take matters into my own hands. Other than some minor assistance with the sink (thanks, Tom!), I was able to get most of the bathroom demolished on my own. Let me just tell you, that vanity was a paaaaiiiiiiin. I may have put several holes in the dry wall and had to kick one side of the vanity until it detached from the wall, but I got that sucker out. It came out in mostly one piece but then completely fell apart when I had to drag it down the front steps and into the garage.

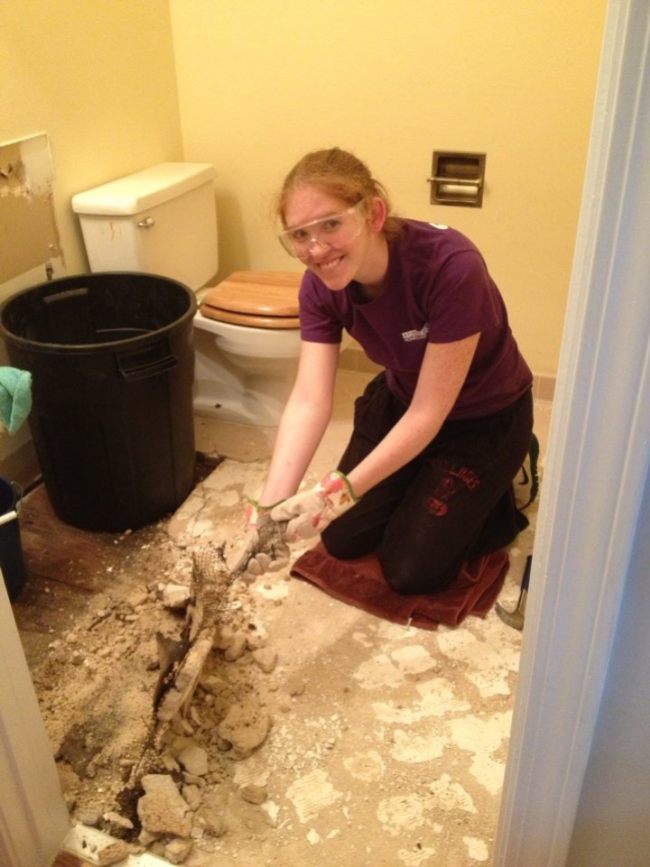
I’m still working on taking out the toilet and the rest of the floor, but our plan is to put in new lighting, paint, and tile this weekend. The new fixtures will start going in next week but the vanity we picked will be out of stock for a couple of weeks. I’ll leave you with this shot of me pulling up the mortar that was underneath the tile:

Image

I’m stoked to be stepping things up a notch and getting into these larger projects! Here’s to hoping it turns out as well in real life as it appears in my head…

Things I Mentioned once and then failed to mention ever again

July 22, 2013

I’m trying to wrap up any loose ends I have right now as far as the blog goes so I can maybe-possibly-probablynotbutIcantryto get more organized. So what you’re about to get is a whole lot of “Remember when? Well this is where we are now” type of stuff. Got it? Okay, here we go.

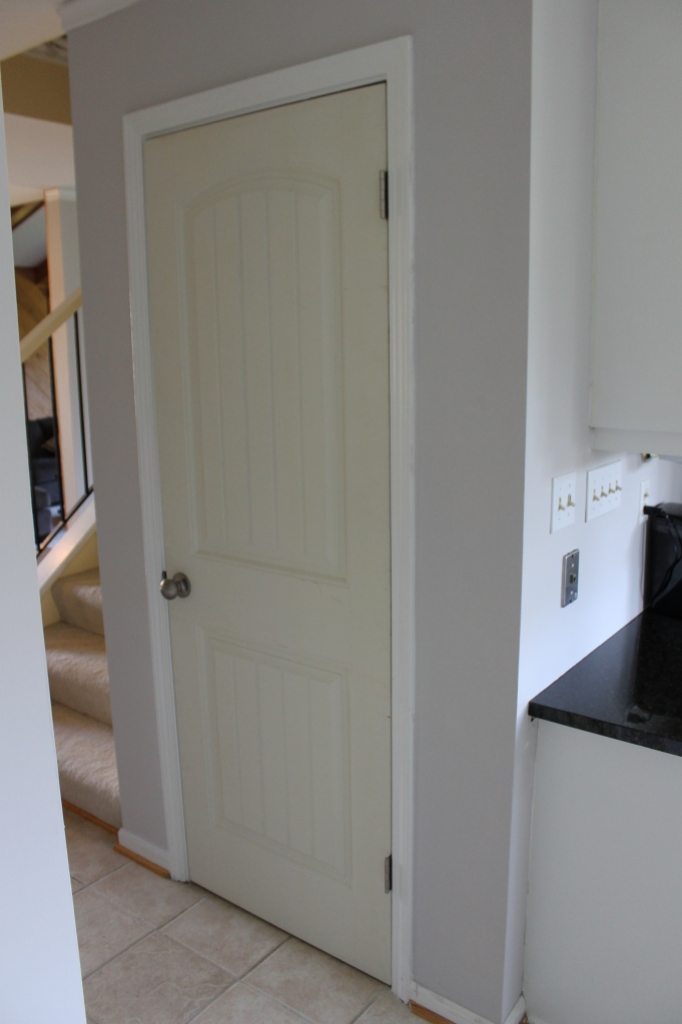
Let’s start with that time I hinted about getting new interior doors. Oh, you don’t remember that? Yeah, I don’t blame you – it was a long time ago. As much as I loved those brown plank doors, I wanted to get rid of them even more. We probably could have added some trim to them and painted them all instead of replacing them but in the end we decided they just had to go. We wanted something with a little interest but not too over the top so we went with these bad boys. They still need to be painted but here is one in action:

IMG_0411

Ahhhhh, much better than the brown.

Moving on. How about that time I mentioned that we finished our kitchen drawers but then never showed them to you? To be fair, this project kind of burned us out and I didn’t even want to look at the drawers any more, let alone talk about them. Wanna see?

IMG_0420

Next up in the kitchen is the great tile project of 2013. We’re thinking a classic white subway tile with a medium or dark gray grout.

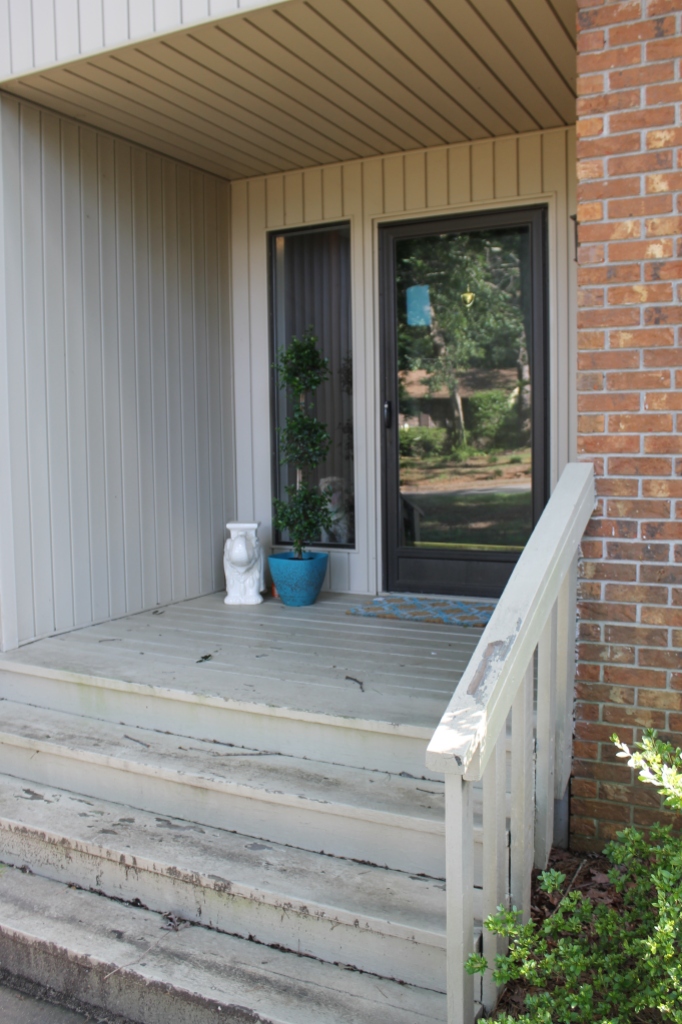
Okay now, do you remember when I showed off my art skills with a drawing of our front porch plan? Well, there’s not much to show because right now it’s looking really rough. We still need to get our second topiary and I think we want to change up the planters we have now. The biggest thing we need to do is power wash and sand the porch and figure out what stain we want to use because that peeling paint is just not doing it for me if ya know what I mean. As embarrassing as it is, this is what our porch looks like right now:

IMG_0415

Ugh. So. Nasty. One power wash coming right up!

How’s about that random post about trim? Yep, nothing has happened on this front and it won’t for a while. We’ve got a bunch of projects we want done within the next few weeks and this one is not one of them.

Last but not least, there was that time I talked about the dining room light saga. We still don’t have a solution for turning the light off and on (unless you can call unscrewing/screwing in the light bulbs a solution) but I’ll at least show you what she looks like:

IMG_0250

Those are the only aluminum mini blinds that I haven’t had ripped out of the downstairs yet – their time is coming soon but for now we still need them there to block the killer evening sun when we have dins.

So that’s where we are as of right now. Later this week, I’ll have Kyle’s tutorial for our DIY Wood and Pipe Coffee Table and maybe even a surprise or two…

DIY Pipe and Wood Coffee Table

July 15, 2013

I know, I know – I suck at keeping up with the blog these days! I have Kyle working on writing a guest post about the coffee table he built but until then, here’s a picture to tide you over:

IMG_0355

Pay no attention to our lackluster sectional…it’s one of those things I’m working on (one of approximately a trillion at this point).

Anyway, Kyle’s pretty proud of it and I was so pleased that I decided we should go fill up his Jetta with more lumber so he can build me a dining room table. Now we just have to find some chairs – any suggestions on where to look?

How to Update a Post Lamp in 137* Simple Steps: Part Two

July 1, 2013

When we last left the post, we had just placed the new fixture on before having to run for cover. After several crazy storms and lots of rain, we were ready to continue on with our process. Well, Kyle was ready to forge ahead while I spent the weekend in Charleston.

So where were we? Ah, yes:

Step 22: Drill new holes into post

photo (5)

Step 23: Screw lamp to post

Step 24: Decide to actually update the lamp post as well

Step 25: Clean post

Step 26: Scrub post with a wire brush

Step 27: Cover and tape fixture to protect it from paint

Step 28: Rake leaves and other debris away from lamp post.

Step 29: Spray paint post with color of choice

Step 30: Realize it may have been easier to paint before installing the new light

Step 31: Show wife finished product upon her return home (she won’t notice by herself because her drive was far too traumatic)

Step 32: Wife: realize your husband skipped Step 28. Decide not to say anything and just enjoy the finished product

Step 33: Skip steps 34-137*…they’re unimportant (and they don’t exist)

That’s it! Easy peasy, right? The hardest part of this project was just picking the paint color for the post. Did we want to keep the black? Satin nickel to match the fixture? A pop of color?

Drum roll, please………………………………………….

TA-DA!

lamp post


We decided to go with a light blue because it goes well with our future plans for the curb appeal of the house – and no, I don’t mean painting the rest of the ground cover blue. Right now it kind of stands out a little more than I’d like it to, but I’m confident that once the rest of the pieces fall into place the lamp post will feel right at home.

Weekend Round Up

June 25, 2013

We had a crazy busy weekend last weekend both socially and around the house. I wanted to pop in and tell you about some of the projects we worked on between birthday dinners, weddings, and naps (hey, a girl’s gotta do what a girl’s gotta do). Warning: this is a photo-less post because I’m lazy and also because I didn’t take any pictures yet. So sue me. 

The biggest thing we did over the weekend was add hardware and put the drawers in the kitchen! The drawers ended up being a huge pain because we didn’t get the second coat of paint on before our glorious Southern summer humidity showed up. We ended up having to wait for a break in the weather since the humidity made the paint thick and sticky (I know there’s a dirty joke there but let’s just leave it, shall we?). 

Here’s a rundown of our other weekend accomplishments:

-Hung new interior door to cat closet. Three down, One to go! Downstairs at least….

-Added trim to bench, caulked, painted. We’re having the seat cushion made so we’re waiting to get the call that it’s done before we do the reveal!

-Lamp post. Actually, we didn’t do anything with the lamp post. We do have the new light on and working but haven’t been able to paint the post yet because of all of these crazy pop up storms.

We also planned out a few more projects to tackle in the next month or so but I’ll talk about those another day. For now, I want to give you guys a chance to win big! Everyone loves free money, right? Well, Michelle over at 4 Men 1 Lady has teamed up with Bounty and the Home Depot to giveaway a $250 Home Depot gift card. Click here to see how to enter to win!

Forward Progress

June 19, 2013

Several projects are being wrapped up this week and I just wanted to share a little sneak peak…

closet

That’s all you get right now – I know, such a tease!

Tales from the Dining Room

June 17, 2013

Ah yes, the dining room. The one room in our house that has zero furniture and zero decor. I promise we do own a dining room table and chairs but it’s currently been living either on our deck so we can eat outside when the nights are nice or in the garage awaiting a good sanding and either a stain or clear coat. The table and chairs are on the agenda for the next two weeks at which point they’ll live in the dining room until we build our new table many moons from now. The point of this post isn’t to ramble about how empty the space is though, I promise!

So why the heck am I talking about a room that has no furniture and other than a couple of coats of paint hasn’t been touched at all? This is why:

dininglight

I understand why it was there, really I do – this room was technically a sitting room/sunroom (uhhhh shouldn’t it have more than one window, then?) which would absolutely call for a fan. It makes more sense to us though to use it as the dining room and this fan had to go. I guess for this particular space we just weren’t fan fans (har, har).

Then came the first dilemma: ain’t no way I was going to shell out over $100 for a light fixture. I wanted something large that would fill the space that also had some sort of interesting detail. I’m not really a chandelier person and everything I loved seemed to be some sort of oversized drum light. Unfortunately for me, these all came in around the $400 mark. Ha. Hahaha. Hahahahahahahaha. No. Nobody pays that much for a light in this house! Not no way, not no how.

One day, we were strolling through this wonderful kingdom of goods. It’s a magical place called Costco. Our mission was to buy chicken, beef, and coffee but then we took a hard right down a mystery aisle and there she was, shining in all of her glory. She was large and in charge and with a price tag of $80, I was sold.

We loaded her up and took her home alongside our meats and a cup of froyo.

Unfortunately for us, this was the most frustrating lighting change to date. Let’s run through the events day by day, shall we?

Day One: Find light. Buy light. Get home at 8pm. Cut the power. Remove the ceiling fan. Discover there is no electrical box in the ceiling to house the wires. Cap the wires. Turn power back on. Call it a night.

Day Two: Go to Home Depot to get electrical housing. Cut the power. Install the light. Turn the power back on. Admire light in all of its glory. Play a little game called “Which Switch is the Right Switch?” – This switch? No. This switch? No. This switch? No. This switch? No. Discover that light does not respond to any of the eleven switches that are in the kitchen/dining area. Unscrew bulb. Call it a night.

Day Three: Play with kitchen switches. Figure out that most of them work flood lights outside. Still leaves one mystery switch.

Isn’t home ownership fun?! Our new plan, whether temporary or permanent we don’t quite know yet, is to install a pull chain. Stay tuned for more adventures in lighting and a before and after showing off our new lovely lighting solution.

How to update a post lamp in 137* simple steps: Part One

June 10, 2013

*This number is totally outrageous. Actually, I prefer to say that it’s an extraordinary use of hyperbole. In reality, it should only take a normal person a handful of steps but that’s not how we do things ’round these parts.

Just to give you a little idea of what we were working with, here is our “before” photo:

photo (19)

Step 1) Send your husband out to do the dirty work (aka installing a new post lamp)

Step 2) Be informed that the screws are rusted

Step 3) Apply liquid wrench

Step 4) Wait approximately a month…not because it’s required but because you’re lazy…or the weather won’t cooperate…or you’re lazy

Step 5) Sporadically decide to once again try installing new post lamp

Step 6) Send husband out to do the dirty work…supervise this time

Step 7) Turn off power so you don’t kill yourself or your husband

Step 8) Hammer screwdriver into old screws to create new screw heads and remove screws

photo (8)

Step 9) Disconnect old lamp

Step 10) Attempt to figure out how in the world the lamp was connected in the first place

photo

Step 11) Attempt to fish out wires

photo (7)

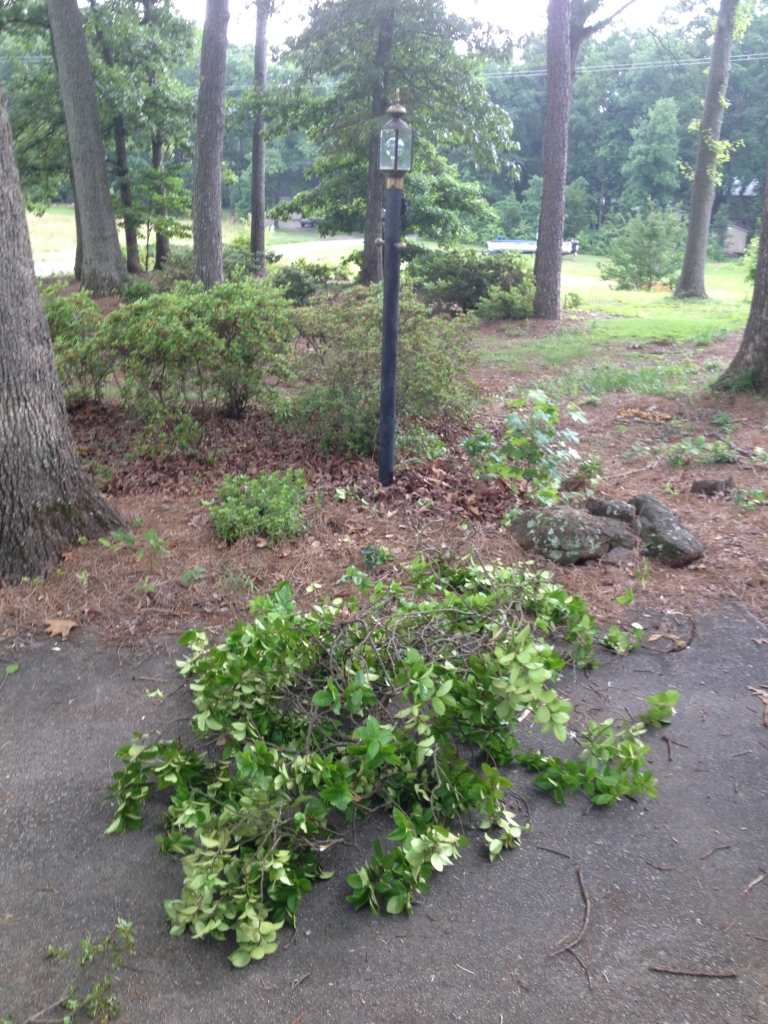
Step 12) Decide to get rid of the massive, unruly vine bush thing that’s in your way

Step 13) Put on amazing floral gloves

photo (2)

Step 14) Unwind branches to remove – use saw when needed

photo (6)

Step 15) Admire your handy work

photo (3)

Step 16) Actually figure out how in the world the lamp was connected in the first place

Step 17) Apply more liquid wrench to the screws around the outlet, do not wait a month to dry this time

Step 18) Actually fish out wires

photo (4)

Step 19) Remove old crusty lamp

Step 20) Place bright, shiny, new lamp on post

photo (5)

Step 21) Grab your junk and run inside because it’s now pouring down rain and oh yeah, there’s a ton of lightning. too.

To be continued when the weather cooperates and we can finish this little project…which is unfortunately not today but probably later this week or this weekend.

Accidental Discovery

June 6, 2013

We recently added another item to our to-do list for the downstairs – new baseboard moulding.  This wasn’t really something we had planned to do but we accidentally found out that it will completely change the feel of the space. How did we happen upon this discovery? I’ll share the story.

Remember the closet project I was working on? Well, we ended up having to order moulding to trim out the bench. It finally arrived and I immediately took it out of the box so I could bask in its awesomeness. Then, I had to figure out where to put it until we were ready to cut it and add it to the bench. Our closets are currently packed to the rafters and our garage isn’t much better. Our dining room on the other hand is 100% empty except for 2 boxes that we haven’t unpacked yet, so I just went and plopped it down on the floor. 

Just look at it:

Image


Apologies for the iPhone quality photo but I was way too pumped to go grab my fancy schmancy new camera. What do you think? I think it amps up the space and makes it look sooooooo so so much better. Of course it would be great if we could also replace that tile floor but that’s one of those projects that’s a couple of years down the road.

I’m stoked about this project since it’s something so small that I think will make a huge impact. Once we wrap up the kitchen and the hall closet, hopefully we’ll get to start on this! Speaking of, I’m hoping the closet reveal is just right around the corner – we’re just waiting on our custom cushion now.

  • « Previous Page
  • 1
  • …
  • 18
  • 19
  • 20
  • 21
  • 22
  • Next Page »

About

the house on the hill blog
Southern made. Lover of animals. Married to a New Englander. Slowly renovating our 1970s home.
Read More

Archives

Copyright © 2025 · Coffee & Dreams Theme by Themes Hub

Copyright © 2025 · Coffee and Dreams Theme on Genesis Framework · WordPress · Log in


Loading Comments...