The House on the Hill

Renovating a house from the 70s in the South.

  • Home
  • About
  • Get In Touch
  • House Tour

Frame It Out

June 3, 2015

Do you ever have those moments where you have such a brilliant idea but you don’t take into account certain things that need to happen in order for it to work? If you’ve been reading here a while, you already know that’s my life story but if you’re new then let me catch you up: Hello, my name is Jess and I don’t always think things all the way through. Luckily, this time it all worked out without too much difficulty.

Let me back up – do you remember when I revealed the craft room and showed off this view?

IMG_4223

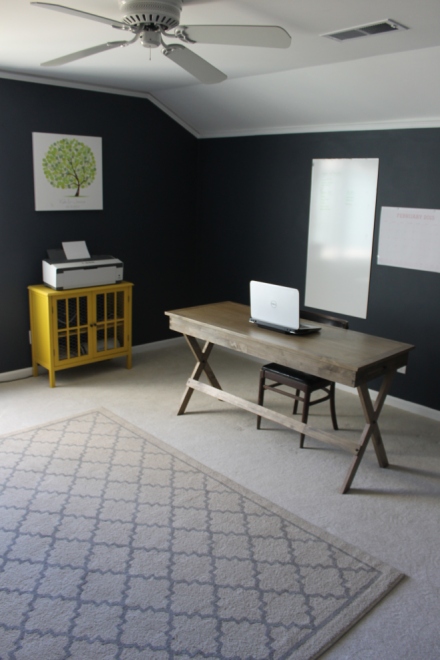
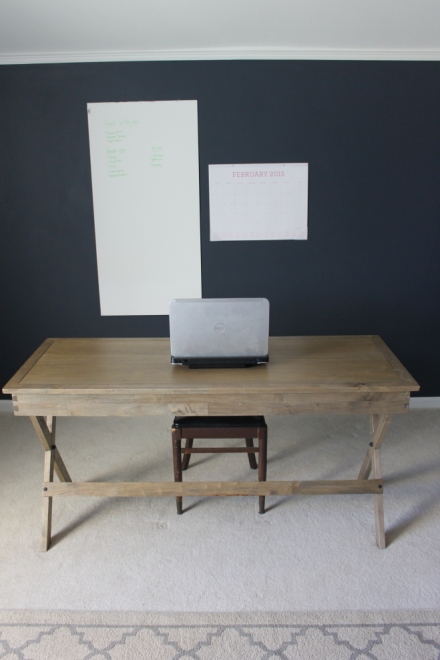
First, I want you to know that this wall isn’t finished but I’m trying to figure out what exactly I want to go here and if I want it all to be functional or if I want to throw in some random crap like art or photos. I don’t know. Anyway, the white board looked a little dinky and unfinished (and apparently a bit crooked now that I’m looking at this picture) so we decided to frame it out; hence my totally clever post title.

framedboard1

Kyle cut and mitered the corners of some 1×4 lumber and then glued the corners together. We only have one right angle clamp so he did it one corner at a time – glue, clamp, let dry, repeat. I don’t know where I was while he was doing all of this…probably painting or spackling something. That is my life these days. When all four corners were done drying, I put a coat of stain to darken it up. I’m pretty sure I skipped the wood conditioner this time because we were running low and I didn’t mind if there were more color variations in the wood.

So far so good right? Except this was the part where we went to hang the frame on the already hung dry erase board and had a big “duh” moment because it wasn’t seamless. From the front it looked fine, but from the sides you could see the edges of the board because the frame was sitting on top of it. We hadn’t actually hung the frame so it was an easy enough fix, just needed to break out our handy dandy router.

First, we took the board off the wall and then laid it on the frame so we could mark out where we needed to route. We were basically shaving away the wood where the board needed to go so that it was inset and the whole thing could hang flush against the wall – hope that makes sense. Once our marks were made, we ended up having to cut down the white board by about an inch or so because the width of the board and frame were pretty much the same and we needed the board to be slightly smaller – Kyle handled this with the circular saw. I took the first pass with the router and I think it went pretty well for my first time but I didn’t remove enough of the frame in some spots so Kyle went back and finished it up. Expect to be covered in sawdust after using a router.

sawdust

After that, we just glued the board into the frame, clamped everything to make sure it would hold together, and let it sit overnight to cure

TA-DA! No more dinky dry erase board and I have a fancy schmancy new place to make lists. We nailed it into the studs using our nail gun and then Kyle went back and hammered in some finishing nails for a little added security.

Framed Dry Erase Board

Yay, a finished project!

In other House on the Hill news, my lazy butt is finally almost done with the guest bathroom (how many times have I said that now?). If my legs work enough to use a step ladder tonight after my run, I’ll be able to caulk the newly installed trim and then I’ll just need to do a couple of coats of paint (I’ve already spackled and sanded the nail holes). Also on deck to show you is a painted wall that is neither gray nor navy (WHO AM I?) and I owe you an update on all of our outdoor stuff because there have been a few changes to our plans.
Weekend Recap

May 18, 2015

Progress is still slow going around the house so I thought I’d share a little about what we did over the weekend. I hate not posting for several weeks at a time so I’m trying to get into the habit of posting more even if it’s not always about DIY or house stuff. Hope you guys don’t mind but if you do you can always let me know in the comments!

Friday and Saturday weren’t anything special although we did go out to Groucho’s for dinner on Friday night which was delicious as always. Kyle wasn’t around on Saturday – I tried to get some yard work done but it was pretty miserable outside so I ended up cleaning the house and working on some of the trim in the half bathroom that was kind of messed up.

On Sunday, we went to the BMW Charity Pro-Am at a local golf course. We were there pretty much all day and even though it was hot out, it was so much fun! Kyle’s company had a Sky Box on the 18th hole so we mostly sat around there and socialized with everyone.

proam1

I’m not much of a golf person but there were still some celebrities in the tournament so it was fun to see them come through. I don’t know if any of you watch NCIS: New Orleans but it’s one of my favorite shows so I was really excited that Lucas Black was still in the tournament. I was even able to grab a picture with him and snag an autograph.

proam2

As a fellow ‘Bama fan, of course I had to have him write “Roll Tide” on my badge.

proam3

We were exhausted when we got home last night so we mostly just lounged around and let the dogs go crazy. I’m hoping we can forge ahead with some yard work tonight to prep for Phase One of our fence but we’ll see. It’s already really hot in our area but if we want to be able to get the fence installed and stained before Summer, we have to get a move on or else it’ll have to wait until Fall.

We also got the trim for the guest bathroom so I’m hoping to have that (FINALLY) finished up soon so that I can share along with a couple of other small projects/updates.

Life Lately

April 21, 2015

Life has been crazy lately and I thought I would just pop in. I owe you guys a bathroom reveal but we ran out of trim and haven’t ordered more yet – in fact, I’m going to do that right now while I’m thinking about it.

Anyway, we haven’t had much time for getting things done and our outdoor work has stalled because Mother Nature decided to throw an extended tantrum. As much fun as pulling up ivy in the rain sounds, we chose to stay inside instead. Last weekend was the first weekend in a month that we weren’t hosting people so we took advantage of that by doing minimal work and just relaxing. I did manage to clean the closet and paint one wall but other than that, not much went on.

It’s supposed to rain again this weekend so if we can’t work outside, I’m hoping we can try to wrap up a few projects inside. OH! We did finally buy a toilet paper holder and a towel ring for the half bath; it’s almost like real adults live here now!

Do any of you have anything exciting going on? Or are you working on any projects? Maybe your progress will give me motivation to get something done! I’m stuck in this rut where I don’t want to work on anything because I’d really rather just rip out the kitchen but if I do that we’ll end up having to live without a kitchen for two years until we can put it back together. I know it’ll all happen in time but I’m feeling particularly impatient these days.

Project Plans

March 27, 2015

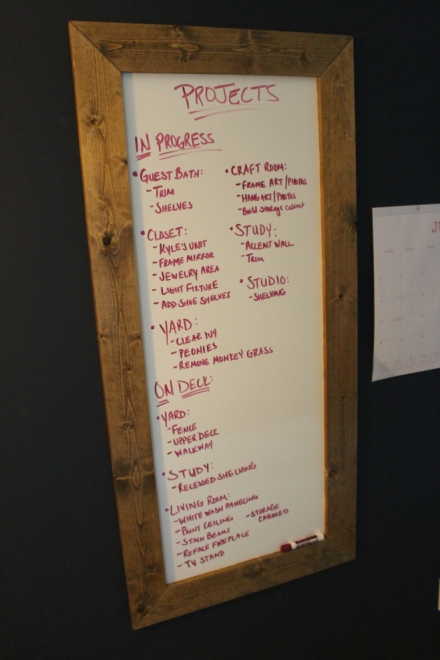
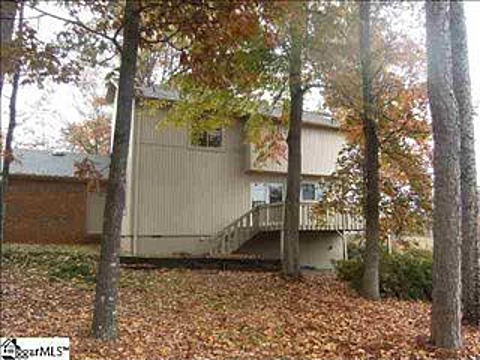
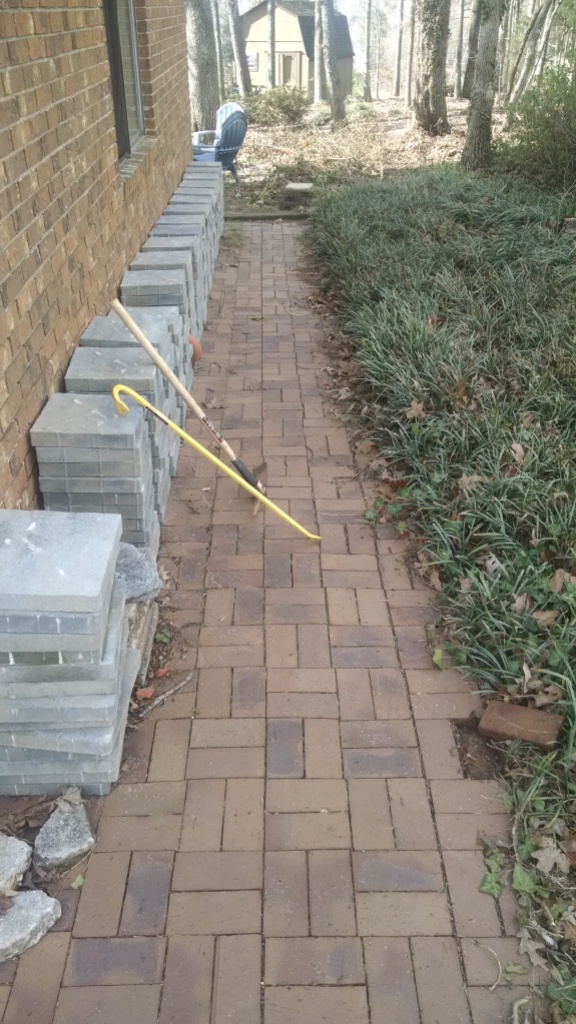
So, I already mentioned in this post that I don’t expect much work to be done inside the house this year. I wanted to explain why we have to do certain things outside before we turn out attention back to the inside. You see, it all started with our kitchen reno plans. I’m sure you’ve heard of one project snowballing into another but this is like one of those epic cartoon snowballs that picks up houses and cars and everything else in its path. The biggest issue is this: Dining Room Yeah it’s all bad, but I’m talking specifically about this. deckdoor This set of doors out to the deck needs to move. The flow of our kitchen does not work right now and it makes me a little ragey. The peninsula ends right where the fridge lives which means whenever the fridge doors are open, nobody can pass which is a huge issue for someone as impatient as me. Yes, I could go back around through the study and end up in the other part of the kitchen but I shouldn’t have to do that! What we want to do is basically swing the peninsula around so that it’s along the back wall but those doors are in the way. No big deal, just move the doors down the wall to the dining room. But if we want to move the doors, we have to extend the deck… Back View If we move the doors down to the dining room now, there would be no deck to catch your fall. If we want to move the doors, we have to extend the deck. Not only that, but our deck is in ROUGH shape. I’m talking day after your 21st birthday type of rough. The posts are undersized and sitting on top of concrete pavers and a piece of rotten wood, the joists are undersized, the wood itself is in awful shape, and the whole thing just needs to be torn down. So now, not only are we expanding the deck but we’re tearing it down completely and having it rebuilt much larger (this is one project that we feel is a bit out of our abilities so we will be hiring it out). But if we want to extend the deck, we have to have the floating deck in place. Backyard Originally, we were going to put in a paver patio in this area behind the garage. Since then, we’ve decided that we’d rather deck this whole area and maybe eventually put in a pergola. We could probably do this after the new deck is in place but it’s going to look more intentional if the lower deck is already in place. But if we want the floating deck in place, we have to build a new fence. fencegat Right now the (very cheap, very temporary) fence ends right at the corner of the house so it’s actually in the way of both future decks. On top of that, the size of the floating deck is going to depend on where exactly we decide to fence the yard. So, before we do the floating deck we have to at least put in one side of the new fence. Jury is still out on whether we’ll just go ahead and do the entire fence but right now it looks like we’ll be doing it three phases. The first phase is the only one we actually need to move forward on the other projects. After that we’ll just have to see how the timing and budget shake out. So anyway, Phase One of the fence is a definite must before we can do the floating deck. But if we want to build the fence, we have to finish the new walkway. Isn’t this fun? walkway To be totally honest, we probably don’t need to do the walkway before the fence but it’ll definitely make building the fence in this area slightly easier. It’s mostly just a project completion thing though. We bought these pavers two years ago (when we first decided we wanted a patio) and they’ve just been sitting against the house. The weather has been nice so we decided to finally get them in the ground. I want to finish this before moving on to anything else because we have way too many unfinished projects and I don’t want another one hanging around. SO. Yeah. That’s pretty much it. As far as timeline goes, we should finish the walkway soon but there will be a few months before we can start on the fence. In that time, I’m hoping that we can finish up the closet and the few other small projects that we already started inside.
Kitchen Sink

March 18, 2015

No, this isn’t a post about the sink in our kitchen. What it is a post about, is all of the random stuff that I’d like to share that I don’t really want to do individual posts for. Sure, I could probably stretch each topic into a post of its own but I’d rather just dump it all into one because nobody wants to read 500 words about a garden box. So grab your twinkies and Moscato and let’s get to it.

Things happening around the house on the hill:

We (Kyle) built a planter box. It hasn’t been filled yet. Patience, grasshopper.

gardenbox

We (mostly me) pulled up all of the improperly laid brick pavers that ran from the front of the house to the back. New paver walkway to come soon.

bricks

I made funfetti pancakes but used the wrong sprinkles so they were mostly purple pancakes with white sprinkles. Julia Child, I am not.

funfetti

We pulled up the scraggly bushes between our yard and our neighbor. Major work still needs to be done.

RIPazaleas

Our animals are adorable.Duh.

gussleeping gatsbysleeping barleyandottersnuggles

And finally, we started planning out our permanent fence. Hoping to start this project this summer.

fenceplanning

Speaking of the fence, we probably aren’t going to have a ton of projects going on inside the house this year. You already know we’re doing a small makeover on the guest bathroom and we’re also working on our closet but other than that I don’t anticipate much progress. We’re focusing on a few big outdoor projects right now because the weather is nice and there are things that need to be done outside before we can do certain things inside.

I know that probably doesn’t make much sense right now but I promise to explain soon!

Guest Bathroom Progress

March 18, 2015

Two posts in one week. Who the heck am I? Anyway, if we can find the motivation to work on the bathroom after work this week, hopefully we’ll be done by the weekend and I can share the finished project on Monday. I’m not making any promises though because we all know I’ll most likely break them.

I mentioned in the last post that we had to come up with a Plan B for our mini-makeover of the guest bathroom. We had two boxes of subway tile just hanging out in the garage and leftover grout from the tile floor in the half bath so we decided to use them in here. Originally, the subway tile was going to go in the kitchen but hopefully we’ll be doing a full on kitchen reno in a couple of years and it no longer made sense in my mind to put in a backsplash that would get ripped out in such a short time period. Of course with the pace that we move, the kitchen won’t actually be done until the year 2043. Here’s a reminder of what we were trying to cover up:

hallbath

I just realized it looks like the cabinet is gone but it’s just painted a dark color. One giant cookie to the first person to guess what color I used – I’m sure it’ll be a big surprise. I spent a few nights removing the wallpaper and getting the wall as smooth as I could to prep for tile. I also primed the wall for good measure. That wiring might look a little scary but it was all housed in a metal casing behind the previous light fixture.

wallpaper removal

Wine helps to dull the pain of scraping painted over wallpaper.

winepaper

All we had to pick up to get this done was a bucket of mastic and one more box of subway tile. I spent about 3 or 4 nights after work putting up all of the tiles. I shared this photo a while back that gives you a glimpse of the tile before grout and the new counter.

tile sneak peek

If I could go back and do it again, I would make all of the cuts I needed as I went instead of placing all of my full tiles first. Some of the tiles jut out a little bit because by the time I went back to put in cut pieces, the tile above it had slid down just a bit and dried in position which didn’t leave enough room for the cut tile. Not a big deal, I still think it turned out pretty fantastic for my first time tiling a vertical space. Thankfully, there were no Toddlers in Tiaras style meltdowns like when I attempted to tile the bathroom floor downstairs. I would also buy a better grout float because we went cheap and ours sucked so badly that I gave up and used my hands to grout 90% of the wall. Hand grouting – the next big thing in home DIY.

Handgrout

Anyway, we just have a couple of projects left for this room and then I can show her off. We’re hoping that next year we can tackle the shower but for now it’s staying as is minus one itty bitty change.

Guest Bathroom – Before

March 16, 2015

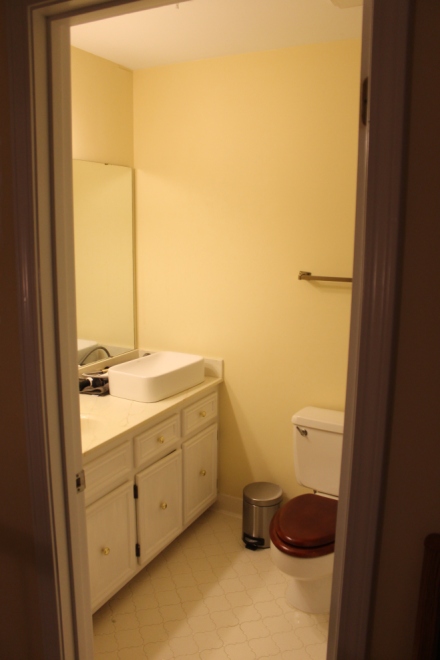
Of all of the bathrooms in the house, our bathroom is probably the worst. Oh and in case you’re wondering, “all of the bathrooms” = 2.5 bathrooms. I would love to rip our bathroom down to the bare bones and make it all luxurious and what not but there’s this thing called a budget and it doesn’t allow for any huge projects right now. So, instead of renovating our master bathroom, we decided back in November that we would do a baby makeover on the guest bathroom which is rarely used but could still use some serious sprucing up. It’s also teeny tiny which makes it nearly impossible to photograph.

Exhibit A:

IMG_3863 IMG_3868 IMG_3871

hallbath

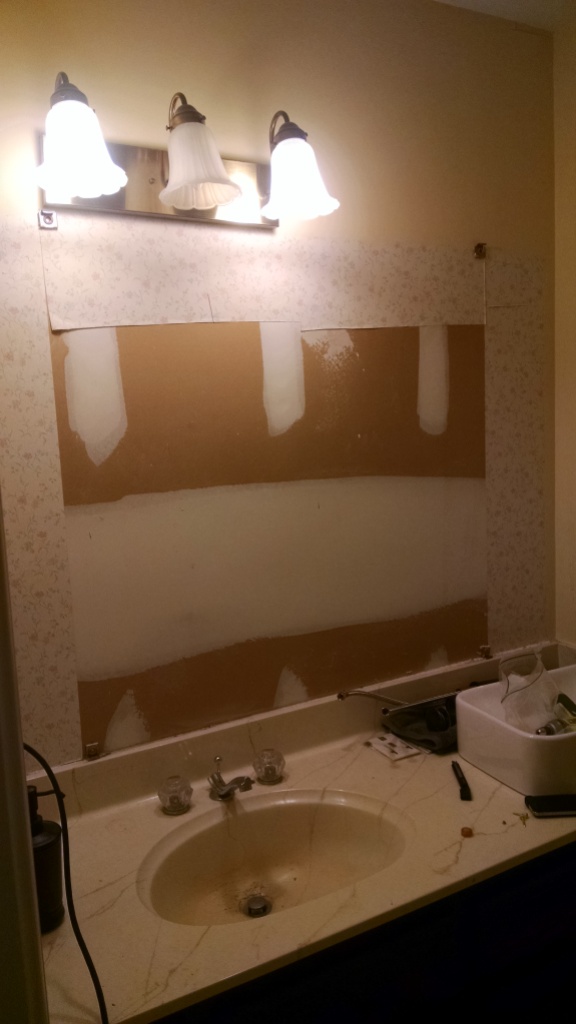
Our original plan for this makeover was to just paint the walls and vanity and to switch out the mirror and light fixture. Simple enough, right? Yeah, well that plan got chucked out of the window as soon as we took the mirror down and feasted our eyes on this:

hallbathPretty, eh? We weren’t really sure where to go from here so the room sat like this for about 2 1/2 months until we found out that our good friends were coming to stay a weekend with us. I really didn’t want to greet them with a half wallpapered wall so we had to come up with another option which I will show you soon! If you follow me on instagram (@jmens6) you already know what we ended up doing here.

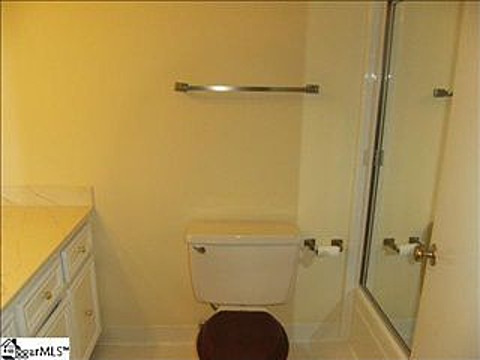
The rest of the room was about as pretty as behind the sink. The sink/counter combo was old and cracked, the faucet wasn’t the prettiest thing I’ve ever seen, and the toilet seat and light fixture were both pretty outdated. The room also had the same yellow-beige that the rest of the house sported when we moved in.

We’ve made a lot of progress in this room but we aren’t finished yet so that’s all you get for now. What? Doesn’t it take you two months to finish one project? No? Show off.

Craft Room Storage Solutions Part Two: Track and Pine Shelving

February 19, 2015

I know I said that I’d post this yesterday and it’s now Thursday evening here on the East coast, but we got our one day a year of winter weather and it totally threw me off. I decided it was more important to snuggle with the puppies and play computer games than to write a blog post and also, I thought yesterday was Tuesday.

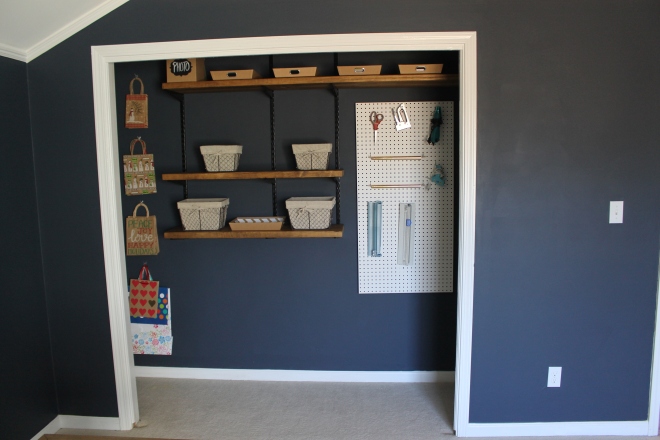
Let’s get to it. The biggest part of my storage solution for the craft room is the track shelving I installed in the closet with a bit of help from Kyle. Maybe one day I’ll learn how to take a photo that’s not crooked.

IMG_4211

My original plan for this space was the super trendy pipe and wood shelving that I’m sure you’ve all seen a million times, but as much as I love the look, I just didn’t think it was worth it to put in here. Instead, I went with track shelving. I normally hate track shelving because it seems so flimsy and unstable but I think the double brackets make it feel sturdier.

IMG_4203

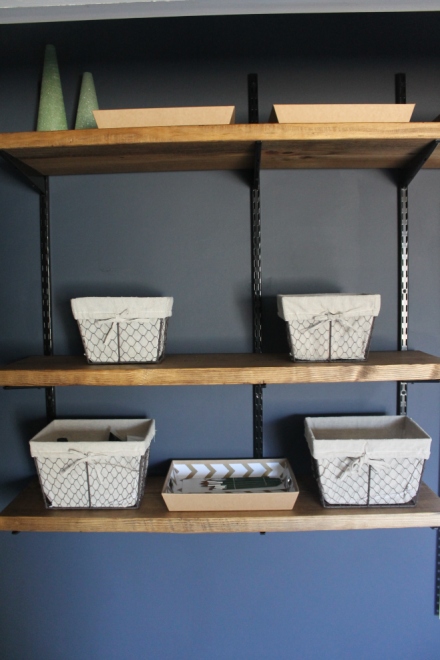
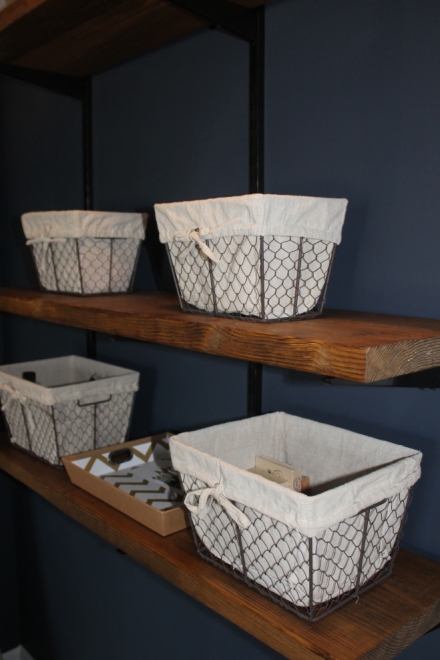
Let’s talk about how I put the system together. The installation was mostly easy – find studs, drill pilot holes to make sure I actually found the studs, screw tracks into wall. Of course, I got halfway through before I realized I needed longer screws (Home Depot trip #2) to make sure the tracks were securely in the studs. I hate drywall anchors and I feel much safer having these tracks secured into studs, especially since I went with 2x shelving. I say mostly easy because I think I hit a couple of knots and I ended up throwing a tantrum and dropping the driver which then bounced off the floor and put a hole in my newly painted wall. Lesson learned: don’t throw tantrums. It’s not cute when you’re two and it’s certainly not very attractive when you’re almost 27 (yiiiiikes, I’m getting old). I used 2×12 lumber for the shelves for a couple of reasons. First, I wanted them deep enough to store vinyl. I haven’t loaded the shelves up with my records yet, but I wanted to make sure I had the option. Second, I’ve seen a lot of shelving units in the blog world where people use 1x or 3/4 melamine and the shelves look insanely saggy – of course they’ll all tell you it’s just the way they’re photographing but I don’t buy it. The 2x is thick enough that I don’t have to worry about the shelves sagging in the middle – I also added one more track than I had originally planned to make sure everything was thoroughly supported.

So why did I go with the track system instead of my original plan of pipe? First and foremost, I wanted something very simple to install. I’ve never put together a shelving unit with pipe and I’m sure it doesn’t take a rocket scientist but the whole “track in wall, bracket in track, wood on bracket” process just seemed as simple as it was going to get. I like my projects like I like my meals – quick and easy. Of course, I don’t do the cooking in our house so every meal is easy for me.

Anyway, I also wanted something flexible. Pipe shelving is stationary – once it’s in place, that’s pretty much it. I want to be able to add/move shelves if I need to and the track shelving is perfect for that. I also think that pipe shelving can look very visually heavy and with the dark walls and wood shelves, I thought it might be a little too bodybuilder on steroids for my taste.

If we ever need to convert this back to a functional closet, All I have to do is pop the brackets out, remove about 20 screws, patch, and paint.

IMG_4202

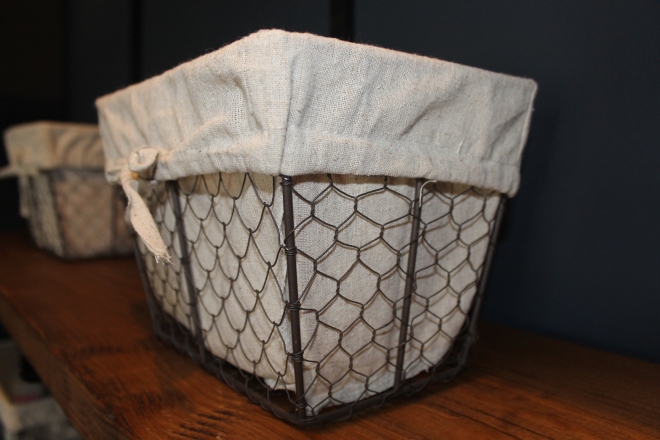
The baskets and paper trays hold all of my craft and office supplies. I want to get more baskets and get rid of the paper trays but for now it works. I also want to build or buy a paper box. We run a small side business making paper goods and it would be nice to have all of my paper separated but accessible. Right now, it’s all piled together in the paper trays. The peg board is home to my crafting tools and foils – I haven’t decided if I’m going to frame it out or leave it as is. I’ll probably leave it as is because it’s functional and I’m lazy. I tried to utilize the whole space and added some hooks to the other side to store all of my gift bags.
IMG_4243

So, that’s that. The shelving has saved me from a black hole of crap and craft supplies not to mention now I don’t have to worry about tripping over something and breaking my neck…except for my own feet which is totally possible. Oh and in case you’re wondering, no I did not find Jimmy Hoffa’s body under all of the crap I cleaned up in the craft room. Let’s take one more look at the before and after just for good measure.

IMG_4129

IMG_4235Oh hey, if you’re wondering why I didn’t take the shelving unit further down, it’s because I’m planning on putting a work table in that space that I can easily move in and out when I need to. I think I picked one I like from ikea but I also might build one since Home Depot is 5 miles from the house and ikea is more like 100 miles. We’ll see…

Craft Room Storage Solutions Part One: Yellow Printer Cabinet

February 16, 2015

Now that the craft room is finished, I wanted to share my storage solutions for the space. Storage was a key factor in this room since previously everything just lived on the floor and it looked like my house was being filmed for an episode of Hoarders. First up, this yellow cabinet:

IMG_4226

If you’ve been following along for a while, you may remember this as the vanity in our half bath after we redid it the first time.

IMG_1419

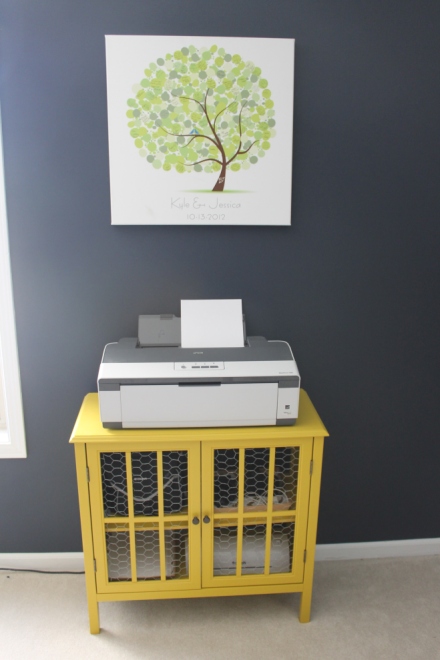
After we changed out that bathroom again, I wasn’t really sure what to do with the cabinet so it just sat against the wall in our study for a few months. Once I started putting my craft room back together, I realized that the cabinet was the perfect place to set my beast sized printer. There were a couple of problems I had to fix first though – the holes in the top of the cabinet where we had the plumbing for the vessel sink and the poorly frosted doors. Putting it that was is kind of cheating though because I didn’t actually fix the holes. The printer is large enough that it mostly hides them and they don’t hinder the functionality so I didn’t worry about trying to patch them.

The doors on the other hand have bothered me since the minute we were done spray frosting them. They’re not so bad from this angle but if you look back at the photo above, you’ll see how bad they looked from the front.

IMG_4174

It was easy enough to get the glass out of the doors – I just had to pry up the rubber that was holding them in place like so (please disregard my gross fingers – I still had stain in my nails from the closet shelving):

IMG_4180

IMG_4181

IMG_4182

IMG_4184IMG_4189

After that, the glass popped out easily.

IMG_4191

I could have just left the doors bare but I came across some chicken wire at Home Depo that was on clearance for less than $5 so I figured I’d give it a shot. Using tin snips, I cut the wire to the size I needed and used my staple gun to secure it to the inside of the door. I also tucked the ends of the wire into the track where the glass used to be. It probably only took about 20 minutes to do both doors and I really like how it turned out.

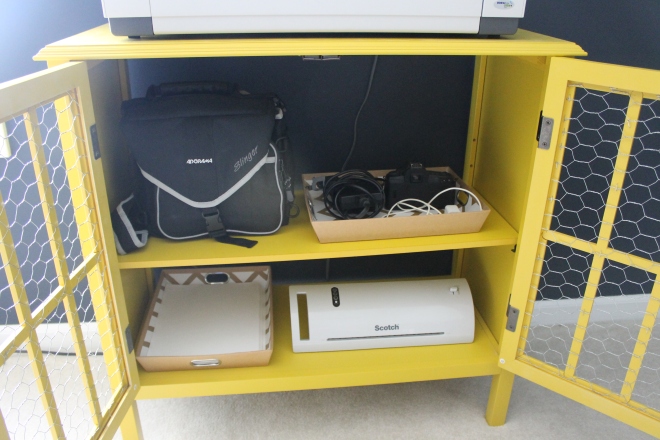
IMG_4254The cabinet holds my camera equipment, charging cables, computer paper, printer ink, and laminator.

IMG_4253

So far, it’s worked out really well and now I don’t have to spend 30 minutes tearing apart the house because I can’t find my camera or computer charger!

I’ll be back on Wednesday with a post on the shelving system we used in the craft room closet – why we chose it, how we installed it, and all of that kind of fun stuff.

We’ve also been working on a little mini-makeover in the hall bathroom that I’m excited to start talking about soon! We’re almost done with it so I’m lagging a little behind on posting but here’s a sneak peek that I posted on Instagram a few weeks ago.

tile sneak peek

Craft Room Reveal

February 4, 2015

This post was inspired by the incredible office spaces at WeWork (a co-working company).

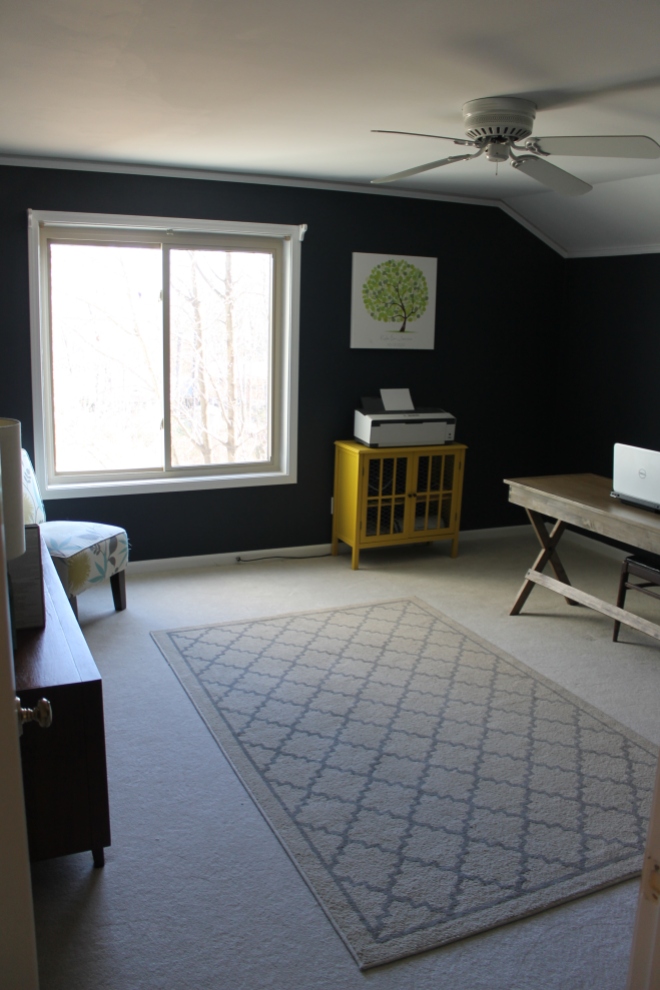
Back at the very end of December, I mentioned that I was going to start working on my creative space. This is the room where I’m supposed to be able to go to play with my hot glue gun and experiment with gold foil but since I couldn’t even get in the room, I usually ended up doing this kind of stuff on the dining room table. Does anyone know how frustrating it is to try to work with twine when you have two cats? Or how annoying it is to have spent hours on a sample of hand-stamped, heat-embossed wedding invitations only to have your dog steal them off the table and eat them? Spoiler alert: it sucks. So instead of letting my room continue to look like this (eeeeek sorry, mom!):

IMG_4127

I finally got my butt in gear and did something about it. Now I have a space that looks like this:

IMG_4218

Less like this.

IMG_4125 IMG_4129More like this.

IMG_4220

IMG_4235

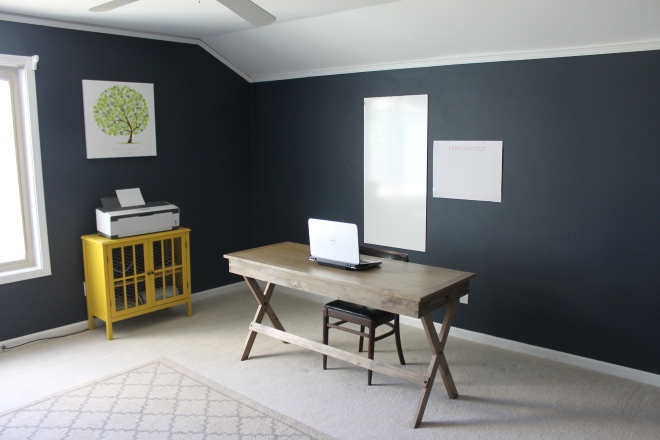
I love it. Sometimes I go stand in there just to be there. Not only is it clean but there’s actually a place to put things away! Cleaning no longer means moving things from one pile to the other and I cannot believe it took two years for me to get this done. The baskets are ones we already owned from World Market and the paper trays are from Target.

IMG_4211

I will say it’s not 100% finished. I still need to frame out the white board and the rug, desk chair, and slipper chair are temporary until I can find something that I like better for the space. I also need to add another lamp or two and get blinds and curtains but I actually don’t mind the naked window.

IMG_4223

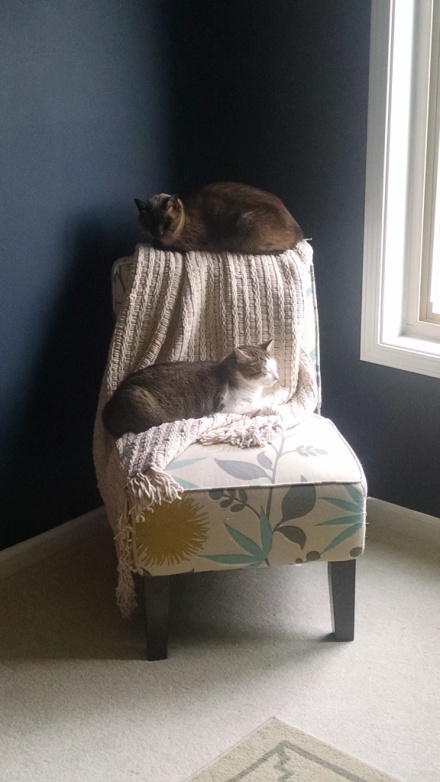
My favorite part is how cozy the room is. I can work at my desk and then curl up under a blanket on my chair and just relax. Sometimes I need a break from whatever it is I’m working on and lounging on a comfy chair by the window sounds just about perfect to me. The cats are big fans, too.

IMG_20150201_131206758

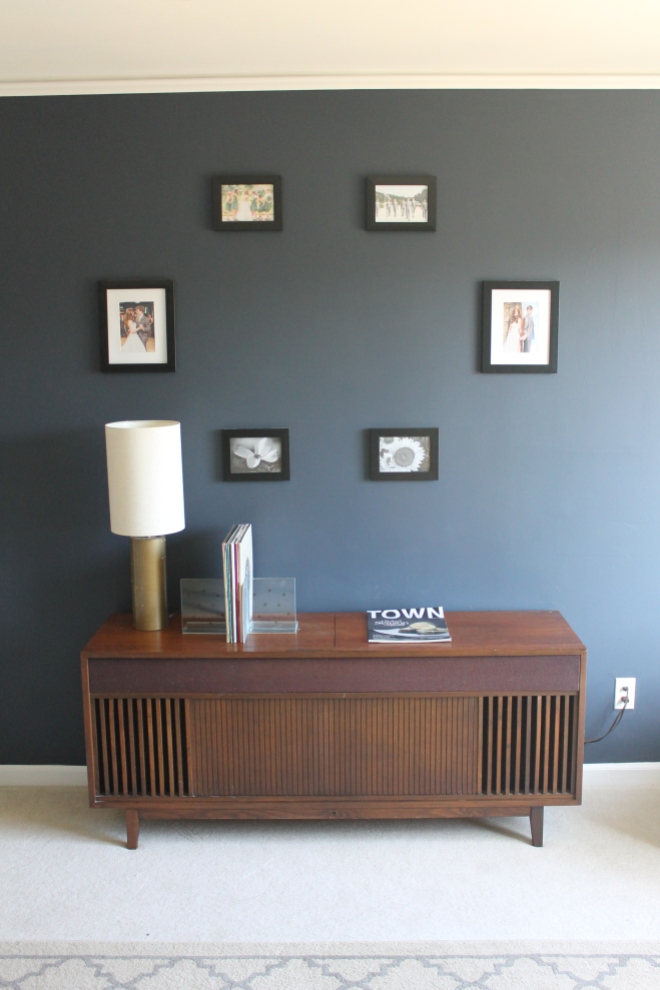
This is my absolute favorite piece of furniture in our entire house. We both love vinyl and own 4 record players. We picked up this fully functioning stereo cabinet at our local ReStore for $80.00. It has a few bumps and bruises but I love it just the way it is.

IMG_4228

I have something going in the big gap in the middle of the wedding photos but it requires custom framing that I haven’t had done yet! I also need to print a couple of photos to go in the bottom two frames.

The yellow cabinet used to be our bathroom vanity in the powder room but I’ve re-purposed it here to store my cameras, laminator, and printer paper. It has two holes in the top from the plumbing but they’re pretty much covered by my mammoth printer. I also removed the poorly frosted glass and replaced it with chicken wire (more to come on that in a future post).

IMG_4226 IMG_4253

In my ideal creative space, I would have a little more natural light (love the dark walls but I wouldn’t hate having one or two more windows), wood flooring, and a buttload of storage. I think I can actually achieve that in this space one day but for now it’s a big upgrade.

Once more – before:

IMG_4125

After:

IMG_4219

  • « Previous Page
  • 1
  • …
  • 12
  • 13
  • 14
  • 15
  • 16
  • …
  • 22
  • Next Page »

About

the house on the hill blog
Southern made. Lover of animals. Married to a New Englander. Slowly renovating our 1970s home.
Read More

Archives

Copyright © 2025 · Coffee & Dreams Theme by Themes Hub

Copyright © 2025 · Coffee and Dreams Theme on Genesis Framework · WordPress · Log in


Loading Comments...