The House on the Hill

Renovating a house from the 70s in the South.

  • Home
  • About
  • Get In Touch
  • House Tour

Our First Home

January 21, 2015

Recently, Urban Compass (a real estate company that specializes in finding the perfect place to live in NYC) reached out to me and asked me to share about our first place for a blog series they’re doing. Since we’re currently in our first home and it’s the two year anniversary of going under contract on our place, I figured it wouldn’t be a bad time to reflect back and talk a little bit about what this home has meant to us.

Here’s a look at the house shortly after we moved in.

frontofhouse

When we purchased our home, it was vacant and had been sitting on the market for a couple of years. It’s not necessarily the prettiest house from the street which I think is part of the reason it hadn’t sold. It was cheap compared to the other houses in the area and in a fantastic neighborhood – quiet, well-maintained, and just a great place to grow. Before we bought this house, we had lived in a couple of different rentals but nothing felt like home until we moved in here. This is the first place that we’ve really felt settled. In fact, I’m not sure if we ever even fully unpacked at any of the places we lived before.

We’ve been slowly making this place feel more like us. Not going to lie, it’s been a little tough. Amateur DIY-ers vs. an outdated 1970s house with weird issues – battle of the century. It’s totally worth it to have someplace that feels like home though. Growing up, my family was constantly moving around; always in or around the same general location but rental after rental after rental. It’s nice for Kyle and I to not have to worry about whether we want to renew our lease and the fact that our money is now going somewhere instead of just vanishing is pretty nice, too.

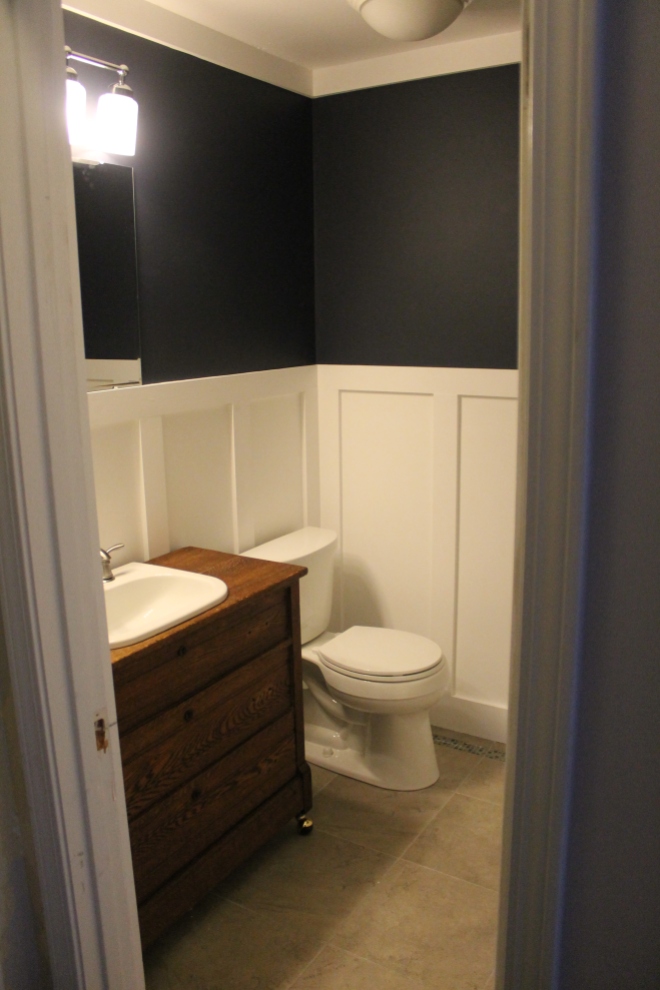
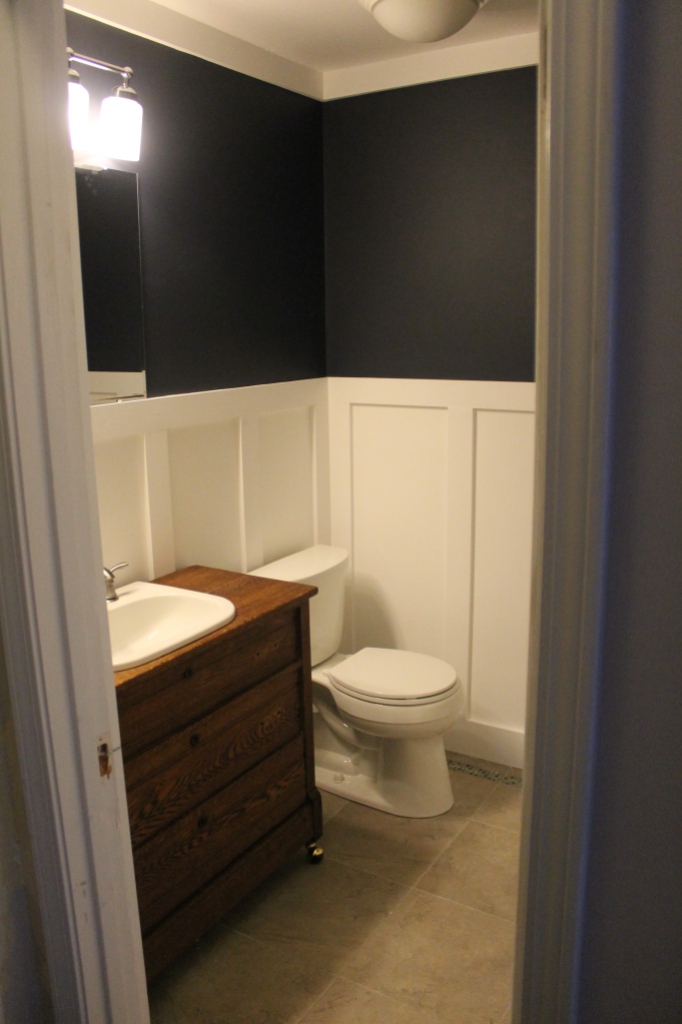
Plus, it’s helping us discover what our styles really are and it’s been fun to come up with ways to mix the two. Here’s our most successful project so far – the second makeover of our half bath:

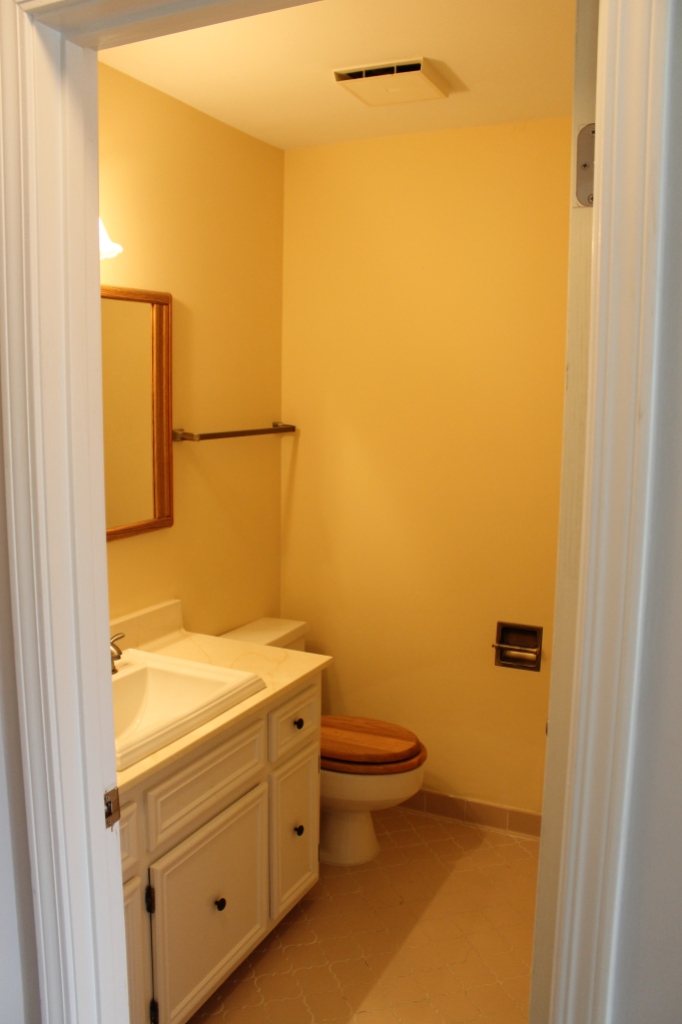
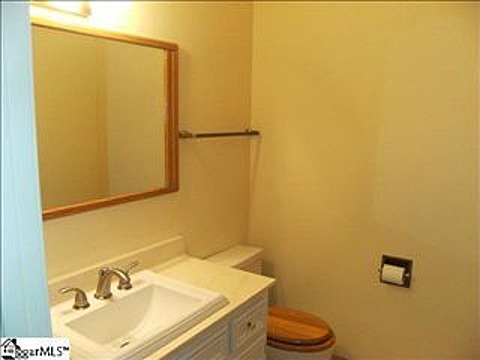
Before

Half Bath Original

After

IMG_3972Of course, we still have a lot of rooms we’re working on (a lot = every room except for the half bath). For instance, here’s a current look at the upstairs hall bathroom.

hallbath

Some rooms have at least gotten somewhat of a makeover. In fact, the first room we tackled was the kitchen, taking it from dark and cave-like to white and bright. I’m itching to do a full gut of this space but for now at least I don’t feel like the walls and cabinets are closing in on me and we’ve since cleared the counters of all of that clutter.

Before

Cabinets and stove

After

IMG_0420

We made the laundry room a little more functional by adding a counter for folding.

Before

photo (10)

After

finishedlaundry

Oh! Oh! AND our front porch isn’t in danger of collapsing at any moment.

Before

frontporchAfter

IMG_3097

We’ve got a lot of small projects that we’re thinking about doing this year and I’m excited to finally work on some rooms that haven’t been touched yet.  Our first home has really been great to us so far and I’m really looking forward to continuing to grow here and transform it into a place we love even more.

Craft Room Progress

January 6, 2015

Happy New Year! Did anyone do anything fun for New Year’s Eve? Anyone have too much fun? It’s okay, you can tell me. It’ll be our little secret – the other 60 people who follow this blog won’t know a thing!

We had an awesome NYE with friends and I was actually productive in the days that followed! 2015 is my year, people.

So what kind of progress did I make? Well, almost all of the painting is done, I just have one small area left where I removed the closet doors and sliding door track. I still have a ways to go but I wanted to share a progress photo for those of you who don’t follow me on instagram (@jmens6).

craftroomprogress_paintAnd in case you think this project has been completely flawless, feast your eyes on this.

craftroompaintspill

Yeah, I don’t think Mr. Benjamin Moore meant for his Hale Navy paint (color matched at Home Depot, by the way) to be used on carpet. Just call me butterfingers. You can also call me “Girl who must now buy a rug to cover a giant paint stain in the middle of her craft room.”

Still to do:

Patch/paint closet trim from where doors were removed
Add storage
Window treatment
Hang art
Organize files and supplies
Buy rug

Let’s Talk About the Craft Room

December 30, 2014

In true Jess fashion, I’m tossing out everything I just said we were going to start working on in 2015 and instead I’m going to work on my craft room/office.

Here’s the thing, my current “craft room” is totally unusable. My desk is covered in old photos, floor samples, binders, paint trays, and a million other things. There are plastic storage containers packed with crap that all need to be put away but there’s no place to put it. There’s also a dog crate in the middle of the room that is no longer being used. This is supposed to be my creative space but right now, it’s just a room where we threw a bunch of junk when we moved in.

You know those rooms in your house where you just keep the door closed? Yes? No? Maybe? Well, welcome to my nightmare.

IMG_4125 IMG_4127 IMG_4129 IMG_4131

Yiiiiiiikes, those pictures are embarrassing.

Want to know what’s even more embarrassing? This is also our current guest room which means we have to shove junk out of the way to make room for an air mattress when we have people stay with us, which luckily is not an often occurrence.

I’m planning on kicking off this project when I’m off work later this week so hopefully I’ll be able to get a lot done while I’m still motivated. Here’s my initial plan which I’m sure will end up growing by a trillion percent:

  • Paint ceiling – I so do not want to do this but there’s old water damage so it really needs to be done.
  • Paint walls – The walls are the color that the previous owners painted the entire house. Not totally offensive but not really what I want. I’m looking for something dark so my plan is to go with navy. Shocker, I know. When you pick yourself up off the floor from that total surprise, we can move on.
  • STORAGE – I currently have one shelf in the closet of this room. Since we’re not using it as a bedroom, I’m taking the hanging rod and shelf out and plan to add in loads more shelving instead.
  • Dress the Walls – We have so many naked walls in the house. I think this would be the perfect room to display some of our wedding photos that I love looking at. We have some downstairs right now but we have new plans for that space so I’ll probably just go ahead and move them up to this room.
  • Dress the Window – The mini blinds have got to go. I’ll replace them with the same white faux wood blinds we put in our bedroom. Curtain TBD – maybe the same gray and white IKEA curtains that are in the rest of the house or maybe this would be a good opportunity to DIY something?

I think this is a good start and hopefully I don’t run into any major snags. I’ve already started cleaning and going through the storage containers to see what I can get rid of (thanks for the help, Kyle!) and the closet doors have been ripped off. If anybody knows where I can pick up a cheap filing cabinet please let me know! I have a ton of files that are screaming for a nice home instead of piled together in a box.

Slacking Off and 2015 Goals

December 9, 2014

We haven’t really been doing much around the house these days. After we finished up the bathroom, we decided that we’d just take a nice break and get going again in the new year. We’re trying to plan out what projects we can do next year but things will probably be pretty boring for the most part. Between trying to boost our savings and paying off debt, there’s not a ton of room for projects but I’ll still try to post every once in a while.

Here are a few things we’re hoping we can accomplish in 2015:

Re-paint downstairs
Paint upstairs
Install new crown moulding throughout
Finish master closet (which I have yet to go into detail about)
Mini-makeover in upstairs hall bath (already started – need to post about)
Replace existing brick walkway from garage to backyard with larger pavers
Spruce up front landscaping (lay down weed fabric and add new mulch)
Build privacy panel to hide garbage and recycling cans

I’m in budget mode now so I’m trying to prioritize projects and figure out when we can do what. Things are getting pretty crazy with the holidays gearing up so I may not check back in until January but I hope everyone enjoys themselves! Christmas is my favorite time of year so I’m just trying to soak it all in and enjoy it.

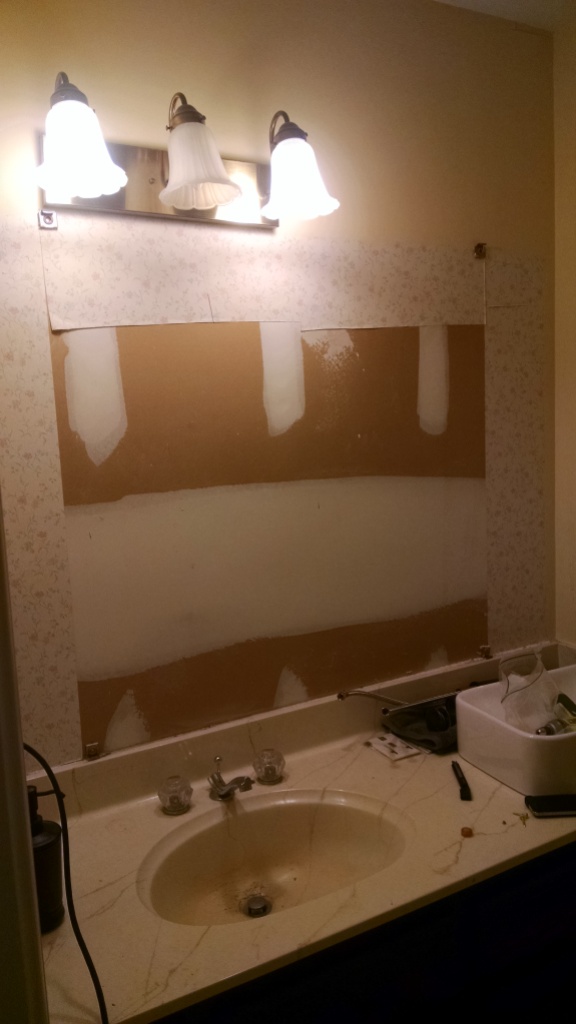
Here is my Christmas present to you – the current state of our upstairs hall bath. Pro tip: When removing those old contractor grade mirrors brace yourself for what lies beneath.

Oy.

DIY Mason Jar Foaming Soap Dispenser

November 23, 2014

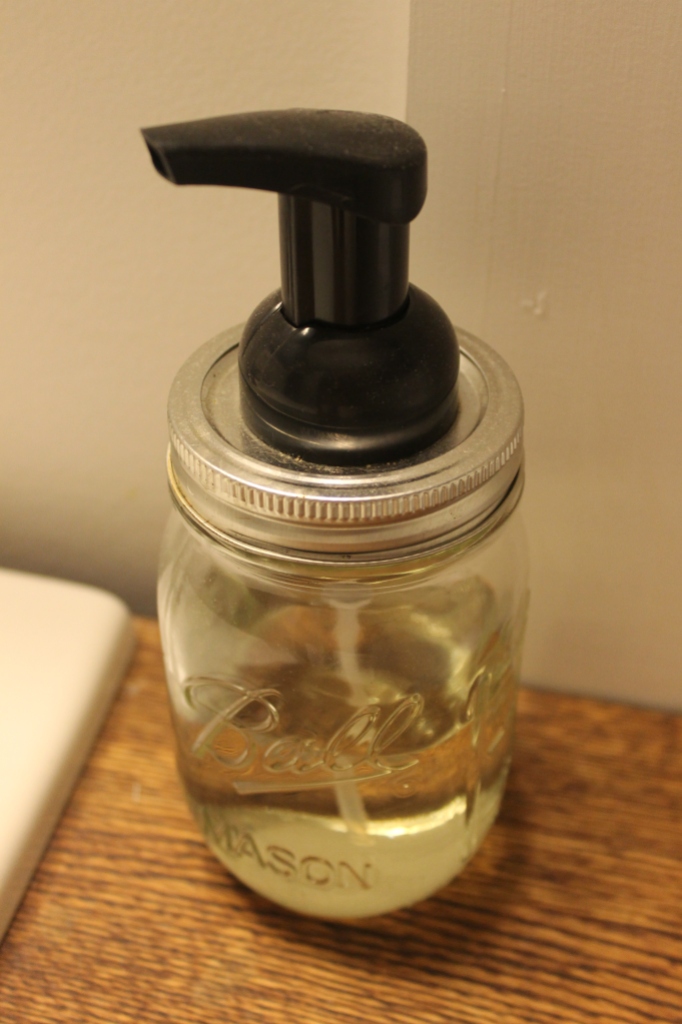
When we decided to redo the half bath, one of the many things we got rid of was the soap dispenser. We had one from target but it seemed to rust from the inside out so it had to go. I guess we could have just bought a bottle of hand soap and left it on the counter but we can never just let things be easy so I made one out of a mason jar instead. My total cost for this project was whatever we paid for the hand soap because we had an extra jar laying around the house.

I’m sure there’s an easier way to do this but I drilled a bunch of little holes in the lid and then used tin snips to cut out the size I needed.

Then, I took the pump from the plastic bottle and squeezed it into the hole for a snug fit.

masonjar1

I’ve seen some tutorials use glue but maybe since the foaming pumps have an extra piece, mine felt secure enough in the hole to leave the glue alone. Also, I forgot all about how I was supposed to use glue and by then I was over it.

I dumped the soap in the jar, screwed the lid on, and plopped it on the counter. Pro tip: do not plop the jar – it might break. Try gently setting it down.

masonjar2

Voila! Mason Jar soap dispenser.

Pre-Thanksgiving To-Do List Update

November 20, 2014

Since Thanksgiving is just a week away (what the heck?!), I thought I would just share a quick update on the to-do list I mentioned a while back.

1) Completely finish half bath  – DONE!
2) Mini upstairs bathroom makeover – In Progress. Hope to share details soon but it won’t be done before Thanksgiving.
3) Fix dining room table top (more on this later) – On hold until after the holidays
4) Refinish dining room chairs – On hold until after the holidays
5) Weed yard  – On hold until Spring.
6) Spread new grass seed – DONE!
7) Re-mulch beds in front of the house – On hold until Spring.
8) Remove ivy between us and our neighbor – In Progress but probably won’t finish until Spring.
9) Remove azaleas in back yard (front yard, too?) – Done in the back yard. Front yard will wait until Spring.
10) Paint downstairs – On hold. Decided to wait until we can also install new baseboards and crown.
11) Fix dining room light (more on this later) – Not done yet but will be done before Thanksgiving…hopefully.
12) Redo existing walk in pantry to add more storage – In Progress. Not sure if we’ll finish this before Thanksgiving or not.
13) Get rid of cabinet in dining room – Not done but will be if we finish pantry.
14) Yard Sale? – On hold until Spring.
15) Hang stairwell light – Not done yet but will be if we can borrow a ladder.
16) Finish first unit in master closet (more on this later) – In Progress, hoping to finish this weekend.

We moved a few of the yard tasks to the Spring because the weather hasn’t been the most cooperative and now it’s getting pretty chilly out. We figure we’ll let the cold weather kill off the weeds and we’ll put down new mulch as soon as the weather starts to turn for Spring.

The table and chairs are functional so we don’t want to touch them right before hosting a holiday meal for fear that we won’t finish.

Honestly, the most important thing was to get the bathroom done and hey what do ya know, we actually did. I’ll take it as a victory.

Turning a Dresser into a Bathroom Vanity

November 17, 2014

Gather round and let me tell you all about the extremely difficult task of turning an old dresser into a bathroom vanity. Originally, we had planned on building a vanity for the half bath but as the project dragged on we gave up on that and started looking around for something else we could use. We couldn’t find anything at Lowe’s or Home Depot that we could agree on and nothing on Overstock jumped out at us either so then we started looking around at local antique and consignment stores. One of the stores I follow on the Facebook posted this photo and I immediately asked about the dimensions and price.

vanityconsignment

After a little bit of haggling and some logistical planning on our part, we picked her up and carried her home. This dresser is from the 1940s and was in pretty good shape but we still sanded it down and applied a few coats of stain to freshen it up a bit.

Anyway, here are the steps we took to get a new to us but actually kind of old bathroom vanity.

Step One: Dismantle as Necessary

Remove drawers and dresser top. The drawers slid out easily and the top wasn’t difficult to pry off at all. Remove the pulls from the drawers.

Step Two: Sand

…and sand, sand, sand. Don’t forget to wipe it down after all of the sanding.

Step Three: Cut a Hole in the Top

This ended up being way easier thanks to something we refer to as “The Garage Door Incident of 2014.” You see, the dresser top is actually two pieces of lumber that had been laminated together to form one solid surface. When we were calling it quits one day, the garage door hit the dresser top on the way down and left a clean break where the two pieces were glued. I won’t tell you whose fault it was but it rhymes with Schmyle.

It’s all good though because it made it easier in the long run to cut the opening for the sink because Kyle was able to cut each piece individually (using measurements he took from our sink) and then put them back together using a bit of wood glue and clamps.

vanitytop

Step Four: Stain

We used wood conditioner before adding several coats of Minwax Early American.

vanitydrawersonly

Step Five: Cut a Hole in the Back

This was the scariest and hardest part of the whole process. Nothing like watching your husband take a jigsaw to the back of a 70 year old piece of furniture!

vanityjigsaw

Step Six: Remove Drawer Backs and Bottoms

We had to remove the backs and bottoms from the top two drawers so that we could fit the plumbing. We didn’t remove the back from the bottom drawer but we’ll need to in the future if we decide we want to use it to store extra toilet paper and hand towels.

vanitybottomdrawer

Step Seven: Put it Back Together

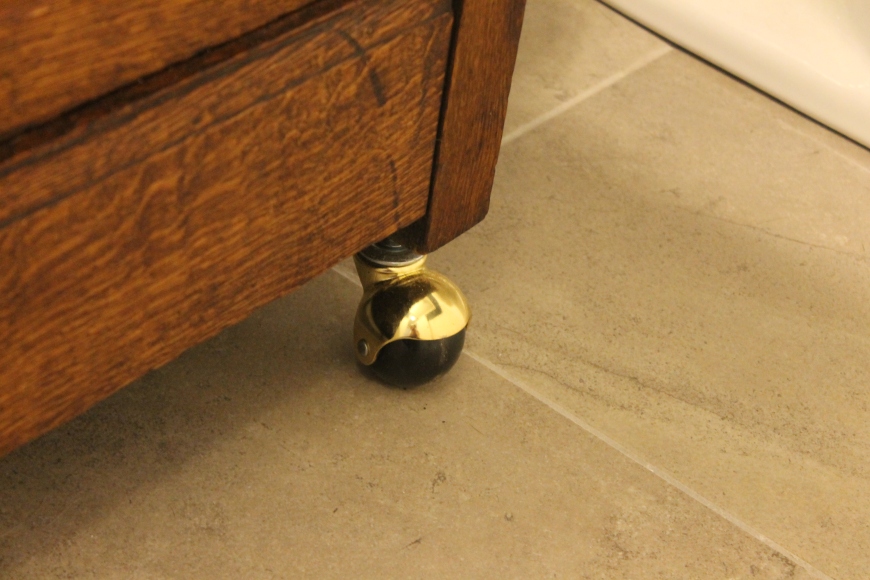
Putting the drawers and top back on was probably even easier than taking them all off. We just slid the drawers in place and then popped a few nails into the top to keep it secure. We added new casters to the bottom to give it more height because it was a smidge too low with the original casters. I’m not sold on the gold of the casters so these may eventually get a coat of spray paint but for now they stay.

IMG_3989

Step Eight: Seal It

Once the stain had time to dry, we used a couple of coats of wipe on Poly. Make sure you leave time for this to cure properly before installing your sink.

Step Nine: Install Sink and Faucet

Drop your sink in and hook all of your lines back up. Turn your water on and make sure nothing leaks.

Step Ten: Admire New Bathroom Fixture

Pour a glass of wine, pat yourself on the back, and enjoy. Tell yourself how impressed you are. Go on, no one else is listening. You are the champion of DIY projects.

IMG_3978

See? Doesn’t that sound super difficult? Yeah, didn’t think so. I think we got this knocked out in about a weekend allowing plenty of drying time for the stain and poly. The only thing we still need to do is decide on pulls and get those put on. I got some really awesome suggestions a couple of posts back and I think we’re close to making a decision.

This set up is so much more functional than our vessel sink and I’m crazy excited not to have to clean up splashy water spills after our next party. Whoop, whoop!

DIY Board and Batten

November 4, 2014

Yikes, totally meant to post this yesterday but once I got my sweatpants on and settled into an NCIS marathon I totally forgot about it. Carry on.

One of the new things in our half bath is the board and batten treatment we added to the walls. We wanted to keep some visual interest since we lost the bright bold colors and modern lines when we changed out the vanity /vessel sink combo and we thought the best way to do that would be to add some fancy schmancy trim work.

IMG_3972

This project is fairly simple but I’m not going to give any specific measurements or anything since that’s going to depend on your own space.

We used 1×4 and 1×6 primed pine boards from Home Depot for this project. We had planned on using MDF but couldn’t find what we wanted and using these pre-cut boards kept everything pretty straight. Side note: we decided to use the same boards as crown moulding and for the door trim on the inside of the bathroom to keep everything uniform.

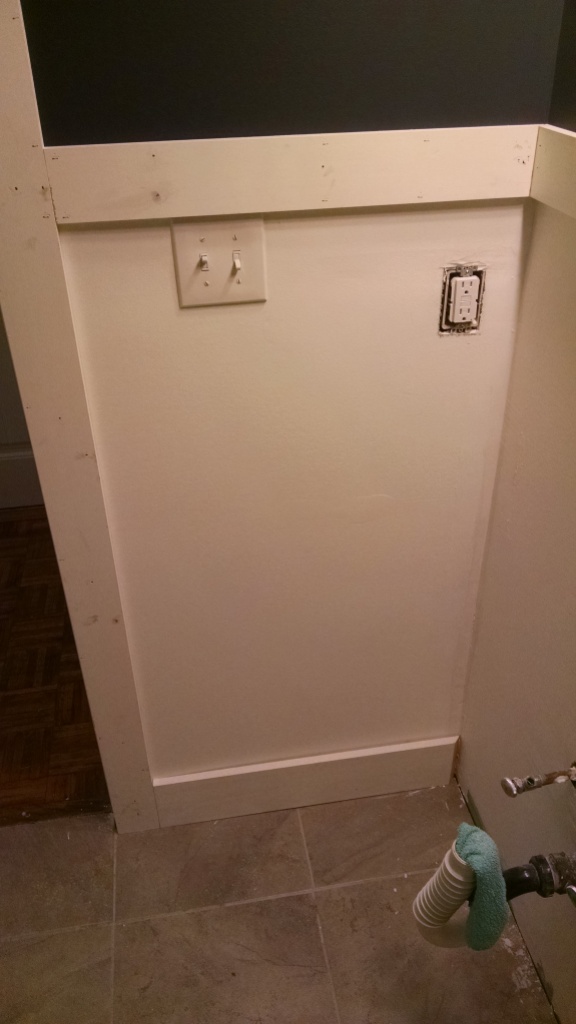
First, we decided how high we wanted the top piece. This really came down to what was most convenient which ended up being just above the light switch. It gave us one less notch to cut plus I think the height helped balance out the dark navy on the top part of the wall.

bblightswitch

We attached the top pieces (1×4) using a whole heck of a lot of nails. I wasn’t comfortable using liquid nails so we used our brad nailer and then Kyle went back and hammered in some longer nails at an angle to help hold everything together. Make sure to use a level to keep everything the same across the room but also check that it looks level to the eye (not always the same thing).

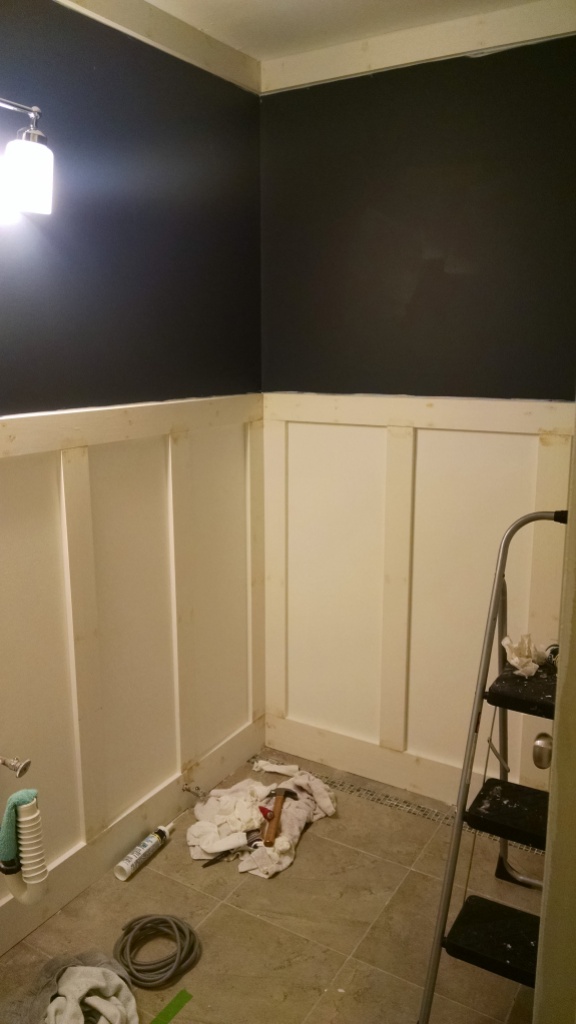
Next, we used the 1×6 as base board around the room. There’s not really a reason we used larger pieces here other than we liked the look. Feel free to use whatever size you want.

bbnobase

The last pieces we needed to add were the vertical slats. You probably noticed that the spacing varies between the short and long walls in our bathroom. We couldn’t find spacing we liked that worked on both walls so we decided to just go with what looked best on each set of walls (long vs short). Depending on how anal you are, the different spacing might bug you but it doesn’t bother us at all. Again, we used the brad nailer and then went back with longer, angled nails.

Originally, we left the outlet and vent flush with the wall but it looked super wonky, so Kyle built them both out to sit at the same depth as the trim…but I forgot to take a picture.

The last step was to fill/sand all of the nail holes, caulk the seams, and paint!

bbfillholes

I think I ended up using three coats of off the shelf Valspar Ultra White from Lowe’s on the trim and walls to make sure everything was nice and even. I didn’t tape anything off because I’m a rebel and also I’m lazy and impatient and hate taking the time to tape. As long as you have a decently steady hand, you should be able to cut in with minimal screw ups, plus I finished the white paint first so that if I got any on the navy, it would be easier to paint over.

We probably spent around $100 on trim which is more than I would have liked but I think it’s worth it. We both really love how it looks in the room so that’s really all that matters. I’m hoping to have another post up later this week about our process for turning a dresser into a vanity and that should pretty much wrap up the half bath posts!


Half Bath Re-reveal

October 27, 2014

We are finally done with the bathroom! Well to be totally honest, we’ve been done for about a week and then I got lazy and decided to do nothing after work other than lounge around in my sweatpants and eat brownies. Not kidding.

Anyway, many moons ago the bathroom looked like this:

IMG_0364

Our first really big project in the house was to rip most of this bathroom out and put it back together so then it looked like this:

bathroomafter

Annnnnnd I didn’t love it. I tried to but it was just one of those projects that looked way better in my head, not to mention the work we did looked a mess in some spots. I somehow convinced my wonderfully supportive husband that we needed to redo this bathroom for a second time even though some rooms in our house haven’t even been touched a first time. So then I started yanking out drywall.

bathroomdemo1

Not sure who is crazier at this point but hey, at least we support each other. Plus, now we have a bathroom that looks like this:

IMG_3972

And I love it! *Cue sigh of relief and choir of angels* We took this bathroom mostly down to the studs leaving just one full wall of drywall and a partial area above the door intact which allowed us to fix a lot of the issues that I originally mentioned in this post.

Sink: The splashy vessel sink is gone forever! And by “gone forever” I really mean it’s waiting to be installed upstairs whenever we get around to our mini makeover of the guest bathroom. Putting it there won’t make it any less splashy, obviously but the guest bathroom is very rarely used so we figure it’s the best place to put it. The new sink is from Wayfair which we ordered specifically to fit in the dresser turned vanity (which I’ll save for another post). We had planned on using a sink we already owned (the one we took out originally) but unfortunately it was a smidge too big. We did use the faucet that was here though so that saved us some money. We’re undecided on what to do for pulls on the vanity – any suggestions?

IMG_3978

Lighting: I was hesitant to use navy paint in this bathroom but with the new lighting, it doesn’t feel like a cave at all. I’m sure some people like a dark, moody place to go to the bathroom but I’d rather be able to see what I’m doing thank you very much. We took out the two sconces and put in a $10 clearance fixture we picked up on a whim at Lowe’s about a year ago. The glass shades totaled about $40 (although they’re showing as almost $10/each online) but they were free to us since we had a Lowe’s gift card. It’s so much brighter in here and you can actually see if you have any schmutz on your face when you look in the mirror. The fan/light combo lives on but only because we couldn’t pry the sucker out of the ceiling. The metal housing is nailed in so we decided to leave it. We may try going at it with a hacksaw at some point but it’s not a major issue so for now it’s fine.

Drywall: Our drywall job this time around was so much better! We were able to get a much smooth finish but we did still have a couple of issues but I think it’s because of the tape we used.

Other random stuff: We ended up grabbing a new mirror because the other one wouldn’t fit between the trim and the light fixture. This one is much larger but I like it and the old one will go in one of the upstairs bathrooms at some point.

Technically, we’re not 100% done because we’re still trying to figure out small details like the toilet paper and hand towel holders. We also want to put a piece of art on the back wall but we’re still trying to finalize details there, too.

I’m planning on doing posts on the DIY board and batten soon plus we have a couple of small things we’ve been working on. In the meantime, enjoy this adorable puppy face. His name is Max and he’s our current foster who is dangerously close to becoming pup #3.

IMG_3901

Two Years

October 13, 2014

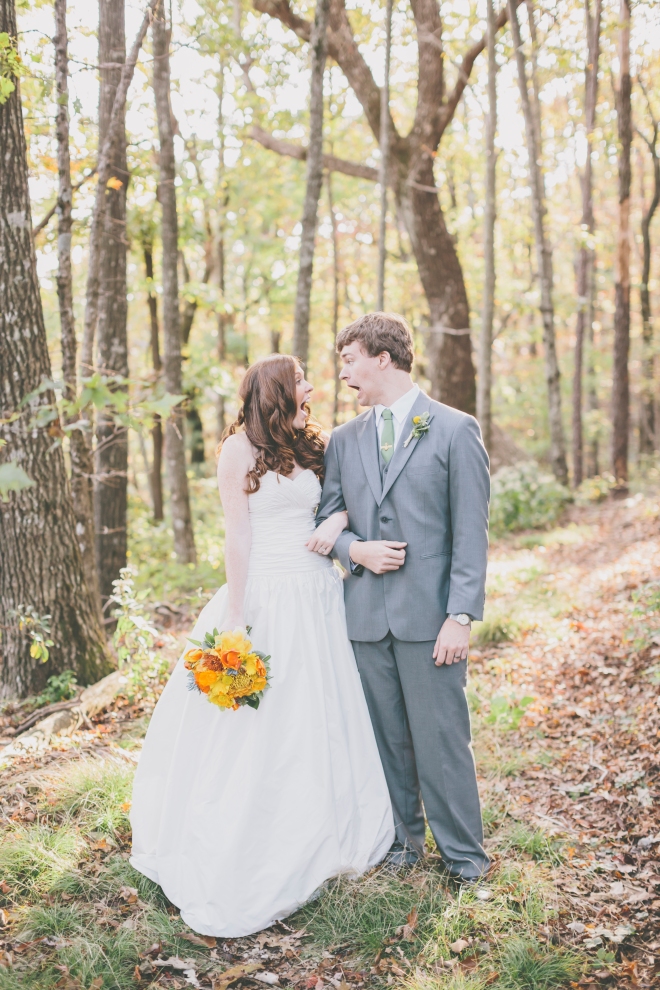
Two years ago today was a special day.

kj_wedding_0006

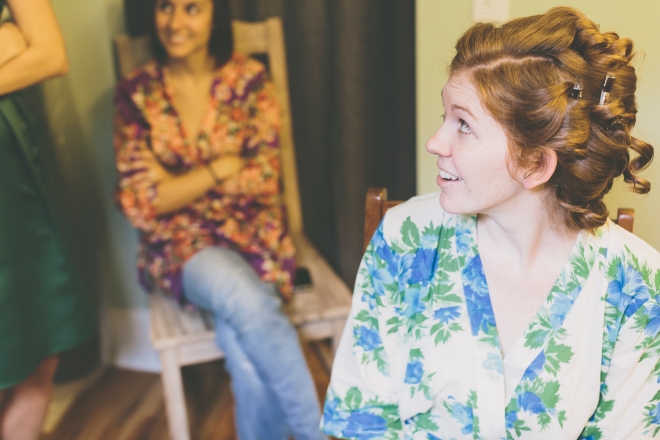
I got to spend the morning with some of my favorite people in the world.

kj_wedding_0007 kj_wedding_0045 kj_wedding_0046

kj_wedding_0048

I put on something old, something new, something borrowed, and something blue.

kj_wedding_0027

kj_wedding_0069

kj_wedding_0019

kj_wedding_0013

And then I killed a little time before heading up the mountain.

kj_wedding_0302 kj_wedding_0306

kj_wedding_0307 kj_wedding_0317 kj_wedding_0322 kj_wedding_0336

I calmed my nerves, the music started, and I made my way down the aisle.

kj_wedding_0370 kj_wedding_0396kj_wedding_0499There were laughs, happy tears, and lots of love.

kj_wedding_0510 kj_wedding_0532 kj_wedding_0547 kj_wedding_0554 kj_wedding_0595

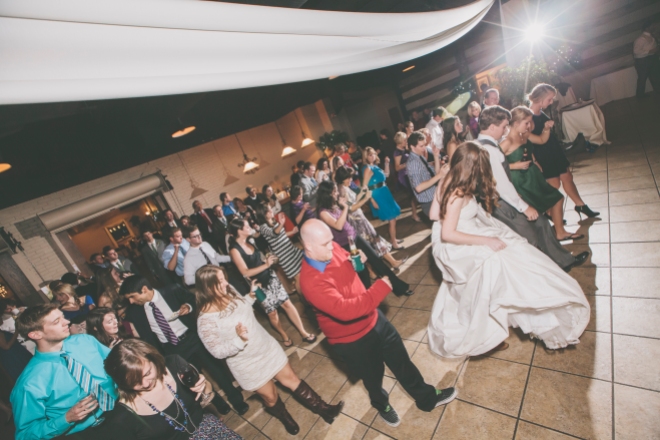
And of course, there was a lot of celebrating (and a lot of cake).

kj_wedding_0643 kj_wedding_0647 kj_wedding_0661 kj_wedding_0662 kj_wedding_0679 kj_wedding_0740 kj_wedding_0742
kj_wedding_0869 kj_wedding_0904

kj_wedding_1018-L kj_wedding_1047-L kj_wedding_1054-L kj_wedding_1056-L kj_wedding_1058-L
kj_wedding_1064-L

It was one of my favorite days.kj_wedding_1068-L

Happy two year anniversary, Kyle! Here’s to many more. I love you a bushel and a peck.

kj_wedding_1062-L

(All photos taken by the magnificent red apple tree photography)

  • « Previous Page
  • 1
  • …
  • 13
  • 14
  • 15
  • 16
  • 17
  • …
  • 22
  • Next Page »

About

the house on the hill blog
Southern made. Lover of animals. Married to a New Englander. Slowly renovating our 1970s home.
Read More

Archives

Copyright © 2025 · Coffee & Dreams Theme by Themes Hub

Copyright © 2025 · Coffee and Dreams Theme on Genesis Framework · WordPress · Log in


Loading Comments...